
Table of Contents Show
Fall weddings often bring cool air, outdoor ceremonies, evening receptions, and outfits with higher necklines or heavier fabrics. Your hairstyle should feel polished while staying comfortable and secure from the first photo to the final dance.
Tired of Natural Hair Breakage, Shrinkage & Tangles?
If your natural hair is always breaking, shrinking up, or taking forever to detangle, this ebook is for you. Learn simple ways to stop the damage and make wash days easier.
These fall wedding guest hairstyles include soft curls, modern updos, braided details, and elegant accessories that pair beautifully with seasonal dresses and formal jumpsuits.
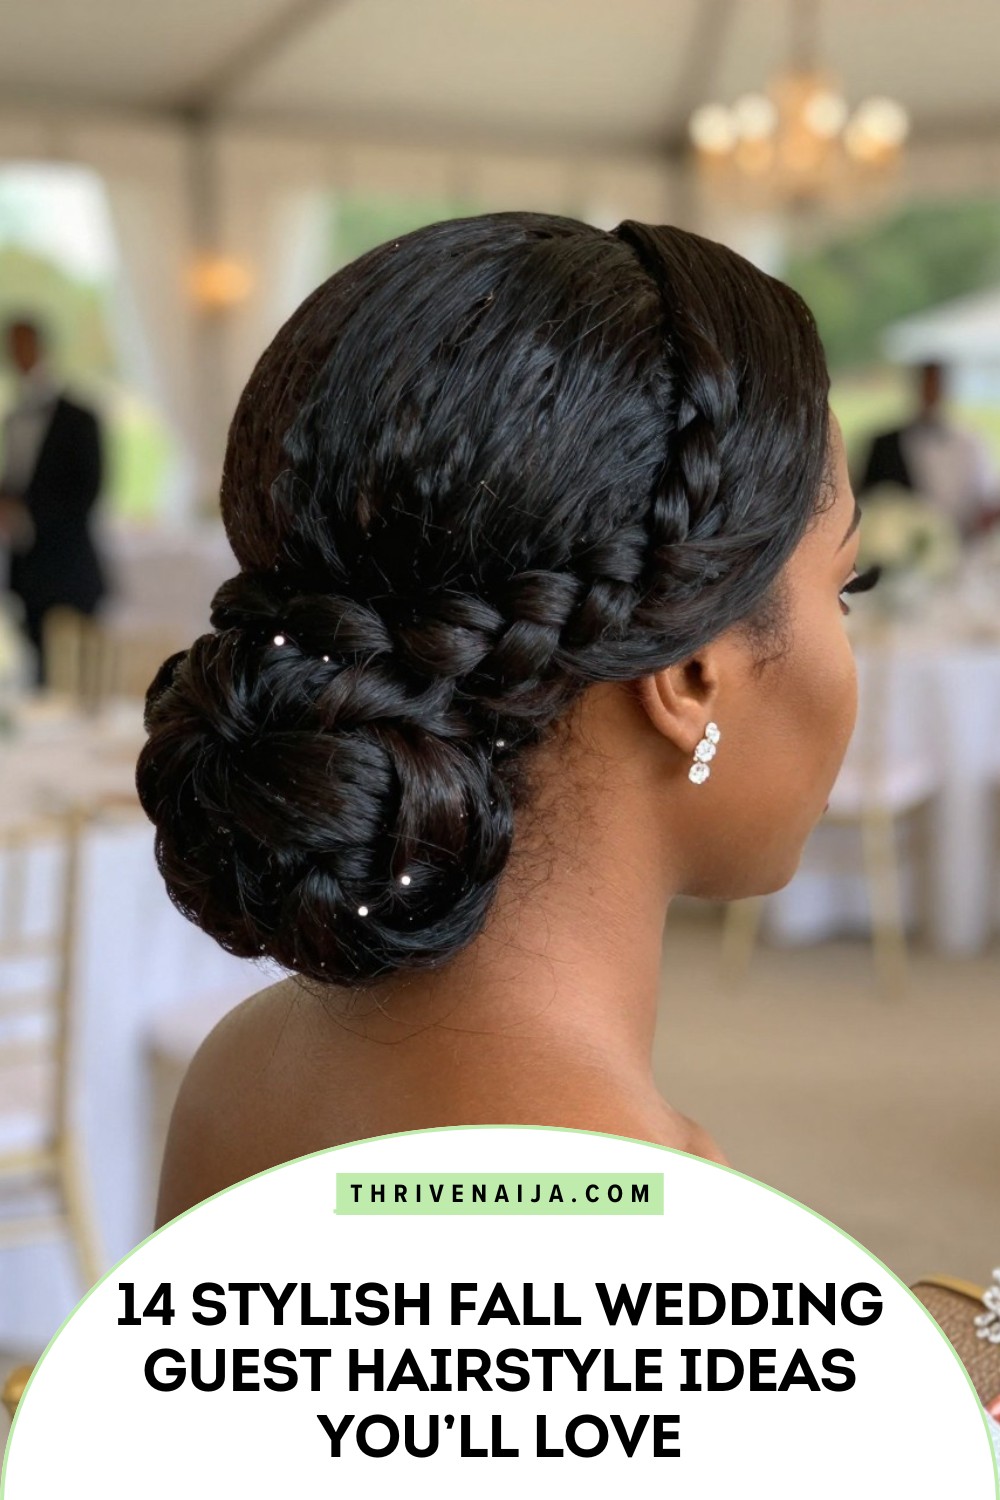
1. Soft Twisted Low Chignon
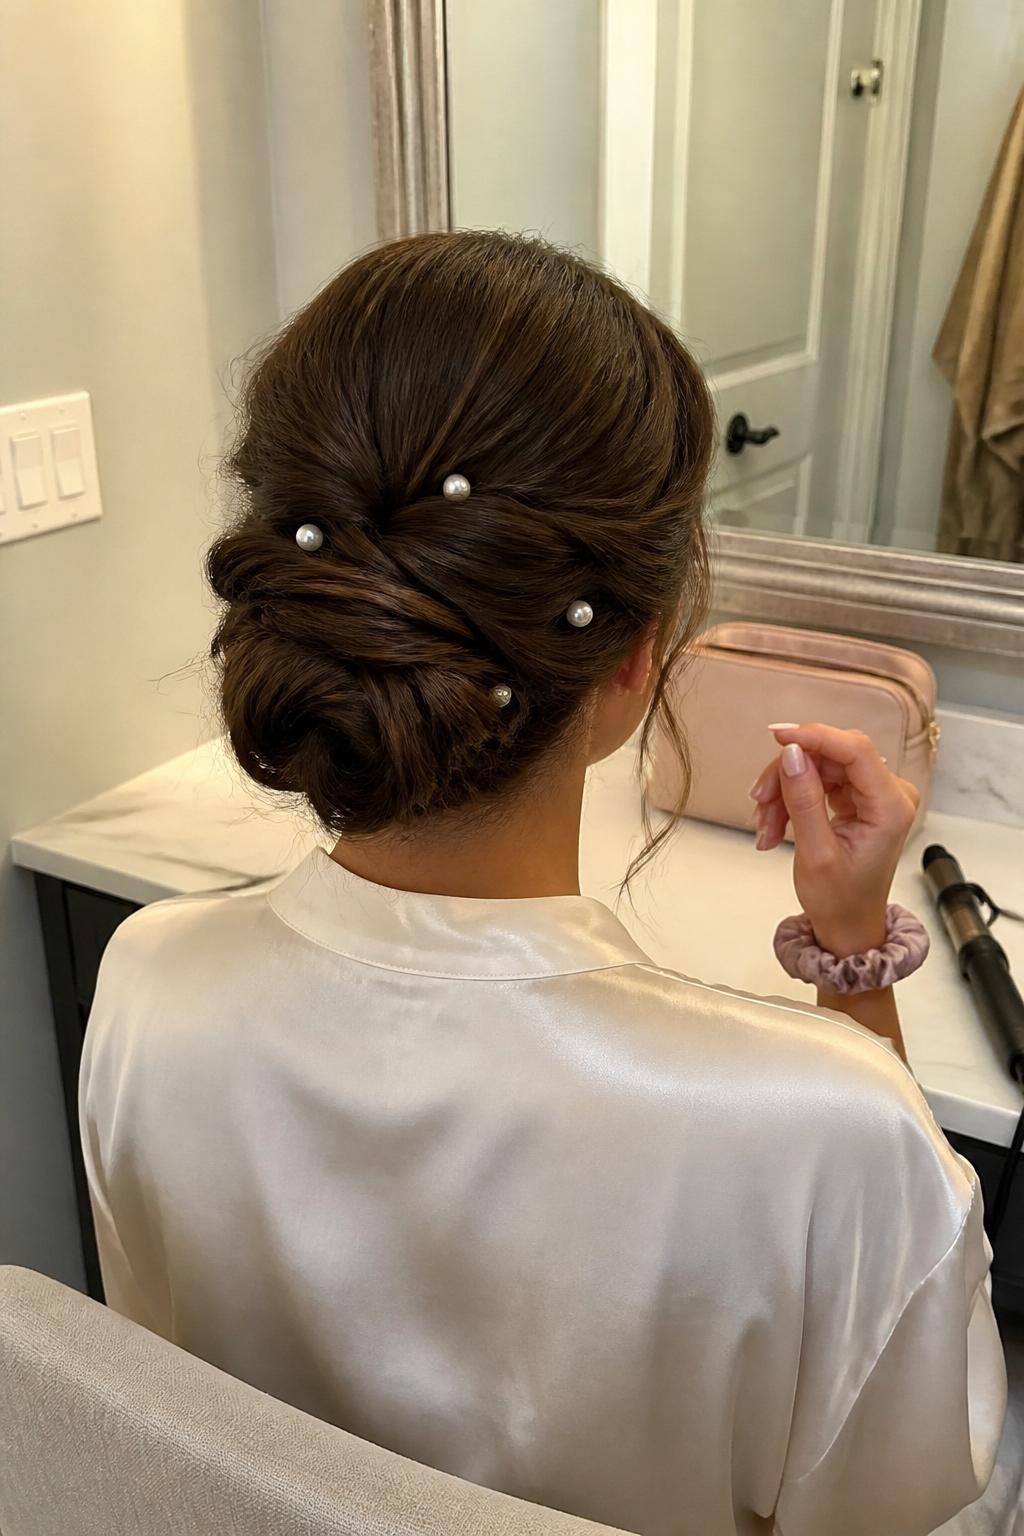
A soft twisted low chignon has a graceful shape with overlapping sections gathered neatly at the nape. It is a lovely choice for formal ceremonies, satin dresses, and outfits with detailed necklines because it keeps the hair lifted away from the shoulders. The slightly loose finish also feels romantic without looking untidy.
What you need
- Texturizing spray to give clean hair better grip
- Clear elastic band for creating the low base
- Bobby pins for securing each twisted section
- Flexible hairspray for lasting hold
- Decorative pearl pins for a dressy detail
How to style it
- Apply texturizing spray through dry hair and create a soft middle or side part.
- Gather the hair into a low ponytail, leaving two sections loose near the front.
- Twist the ponytail into a rounded chignon and secure it with bobby pins.
- Twist the front sections backward, cross them above the bun, and add a few pearl pins.
Quick tip: Cross bobby pins into small X shapes underneath the bun to help it stay secure during dancing.
2. Side-Part Hollywood Waves
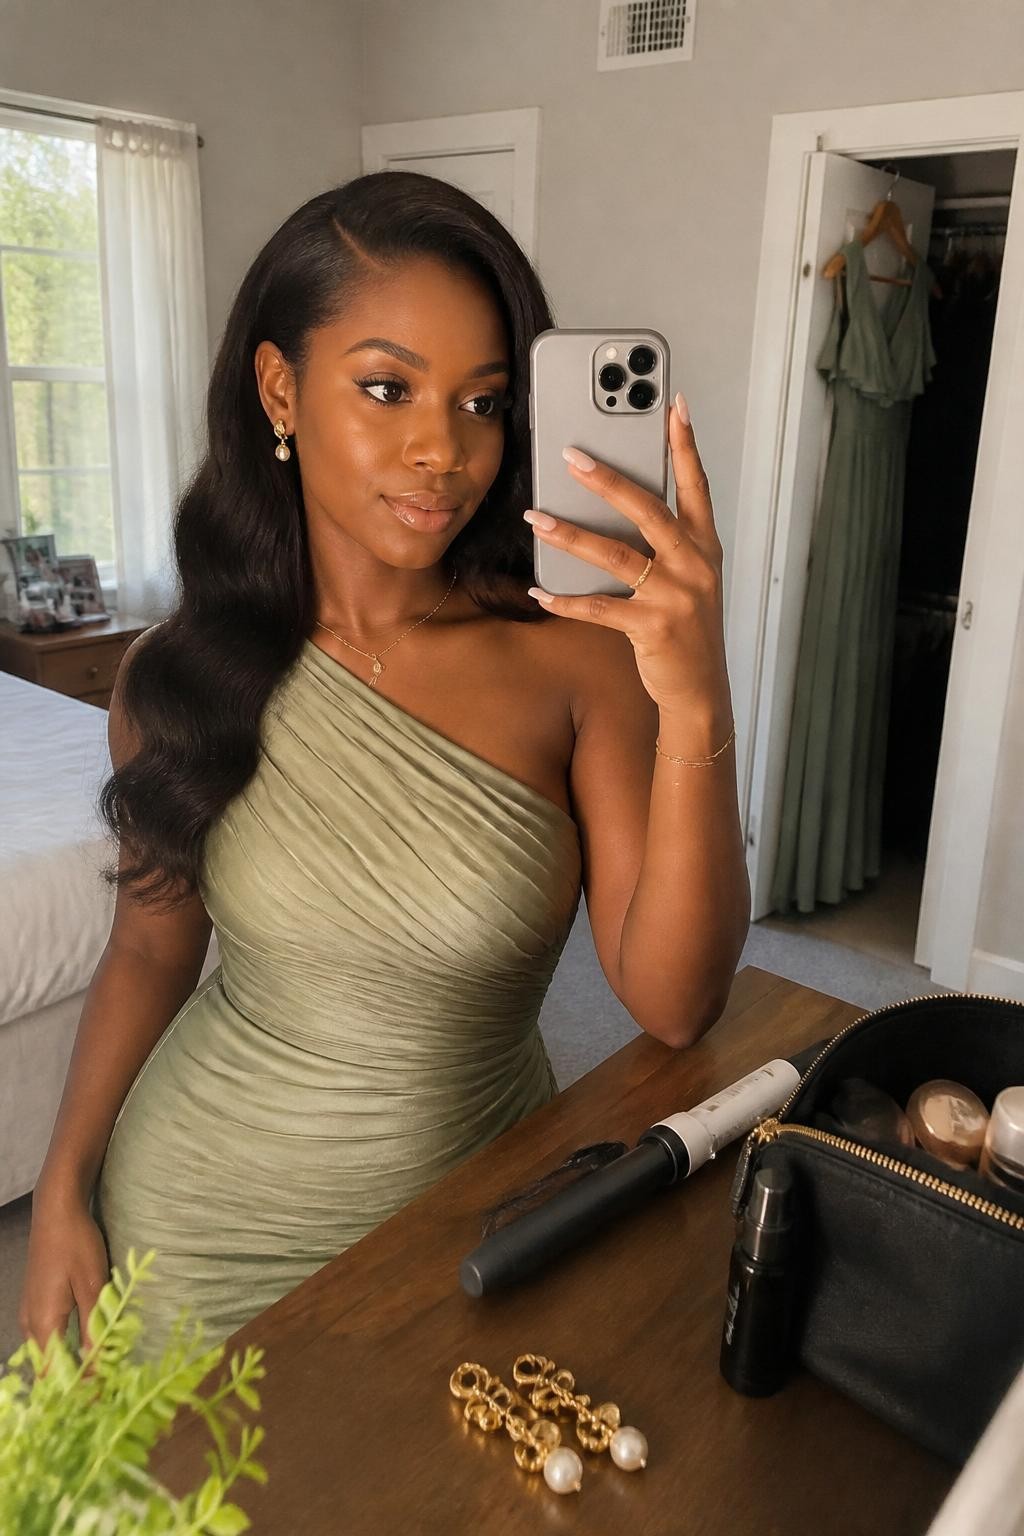
Side-part Hollywood waves create smooth, defined curves that fall over one shoulder for a classic evening look. This hairstyle works especially well with one-shoulder dresses, strapless gowns, and fall weddings held in hotels or formal venues. It is best for medium-length or long hair that can hold a curl.
What you need
- Heat protectant to shield the hair
- Large-barrel curling iron for wide waves
- Sectioning clips for setting each curl
- Wide-tooth comb for shaping the pattern
- Strong but flexible hairspray for hold
How to style it
- Apply heat protectant to dry hair and create a deep side part.
- Curl every section in the same direction with a large-barrel curling iron.
- Pin each curl against the head and allow it to cool completely.
- Release the curls, brush them into smooth waves, and secure the smaller side behind one ear.
3. Braided Crown with Loose Curls
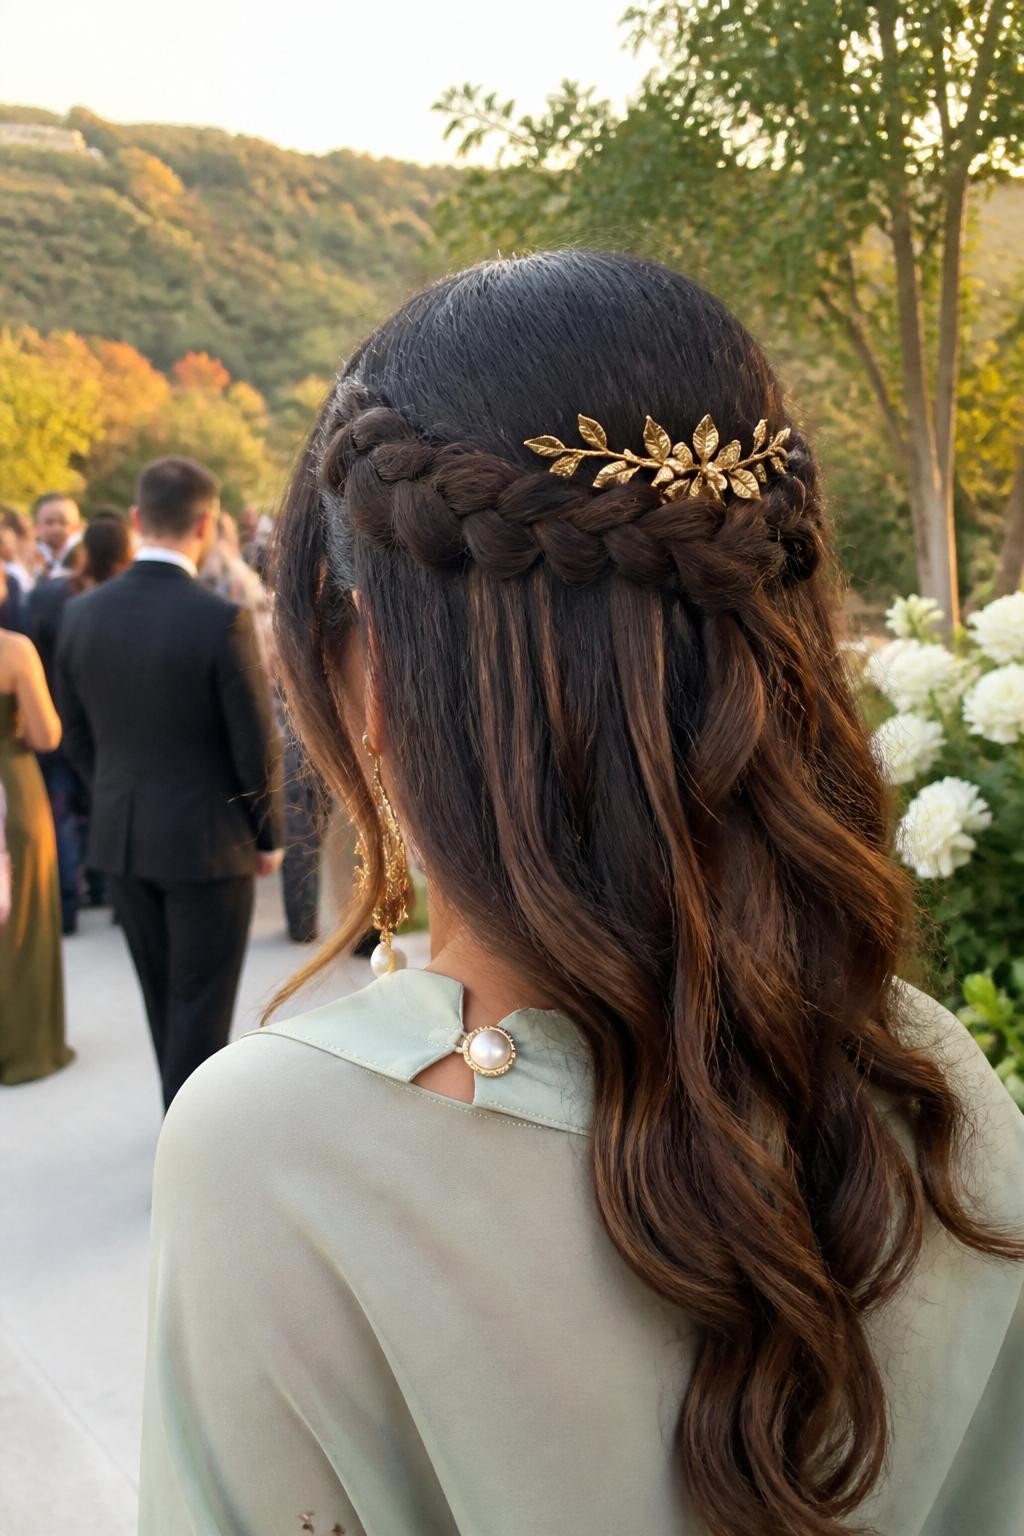
A braided crown with loose curls frames the head gently while leaving soft movement through the back. It is well suited to romantic garden weddings, barn ceremonies, and outdoor fall celebrations. The braid also keeps shorter front pieces controlled if the weather becomes breezy.
What you need
- Curl-enhancing cream for defining the lengths
- Medium curling wand for loose curls
- Clear elastic bands for securing the braids
- Bobby pins for forming the crown
- Small gold leaf pins for decoration
How to style it
- Curl the hair in loose sections and allow it to cool before separating the curls.
- Take a section above each ear and create two simple three-strand braids.
- Bring both braids across the back of the head and pin them into a crown shape.
- Cover the elastic ends, loosen the braids slightly, and add two or three gold leaf pins.
4. Sleek High Ponytail with Curled Ends
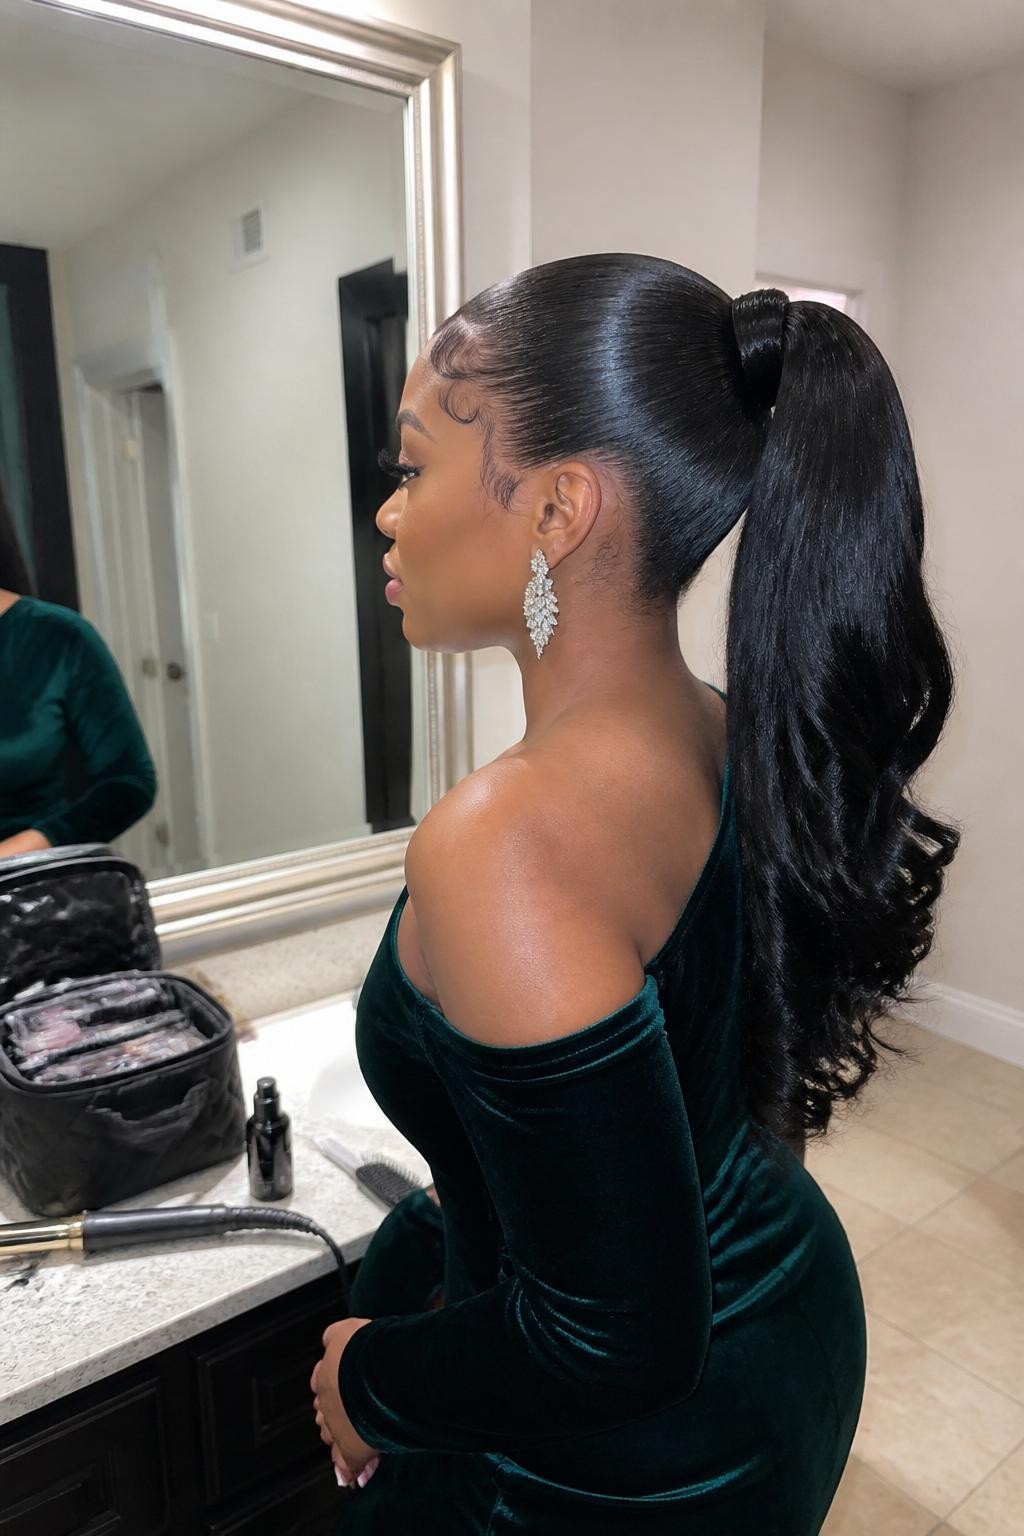
A sleek high ponytail with curled ends feels modern, clean, and polished enough for a formal reception. It works well with high-neck dresses, fitted jumpsuits, and statement earrings because it leaves the face and neckline open. The curled length keeps the ponytail soft rather than overly sharp.
What you need
- Strong-hold styling gel for a smooth base
- Boar-bristle brush for gathering the hair
- Strong elastic band for support
- Ponytail extension for optional length
- Curling iron for shaping the ends
How to style it
- Apply styling gel to stretched hair and brush it smoothly toward the crown.
- Secure the hair firmly with an elastic and attach a ponytail extension if needed.
- Wrap a small piece of hair around the base to hide the elastic.
- Curl the ponytail ends, separate them gently, and smooth any flyaways.
Quick tip: Avoid placing the ponytail too close to the front hairline, as a slightly lower crown position usually feels more comfortable for a long reception.
5. Curly Side-Swept Updo
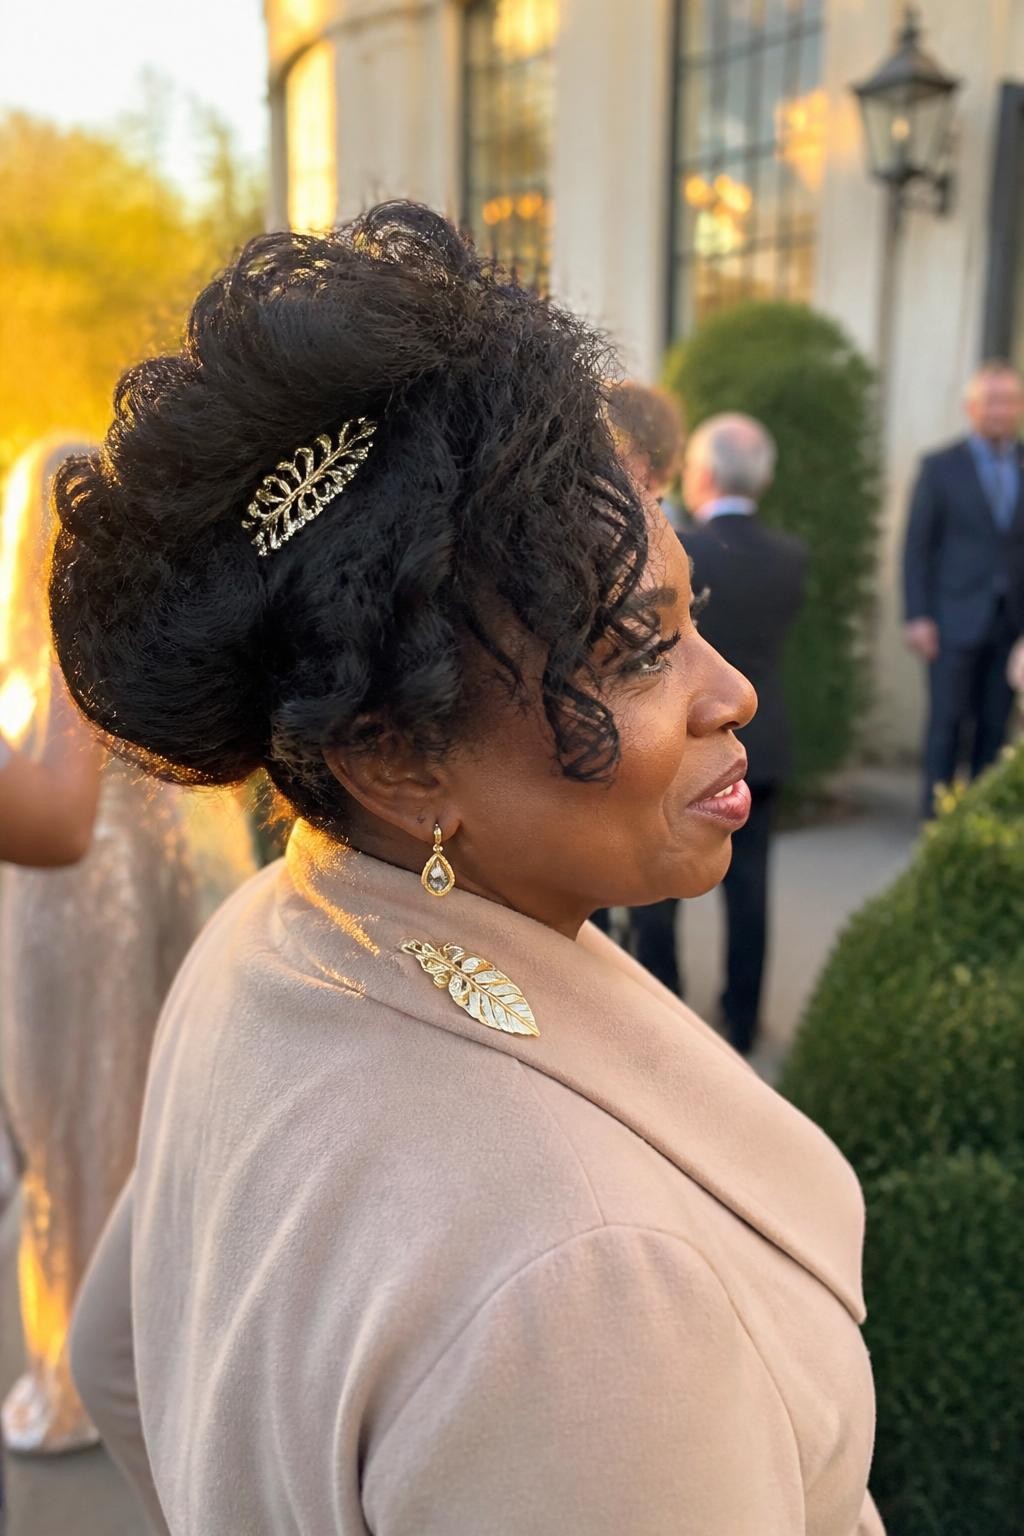
A curly side-swept updo gathers defined curls into a soft cluster above one shoulder. It feels romantic and polished, making it a strong choice for cocktail dresses, lace gowns, and evening weddings. The pinned shape also helps naturally curly hair remain controlled in outdoor weather.
What you need
- Curl cream for refreshing and defining curls
- Small elastic bands for hidden support
- Bobby pins for building the side shape
- Edge brush for gentle hairline styling
- Decorative comb for a formal finish
How to style it
- Refresh the curls with a small amount of curl cream and create a deep side part.
- Gather the lower hair toward one side and secure it loosely with an elastic.
- Fold and pin individual curl sections upward into a full side cluster.
- Arrange the curls around the face and slide a decorative comb above the updo.
6. Polished French Twist with Volume
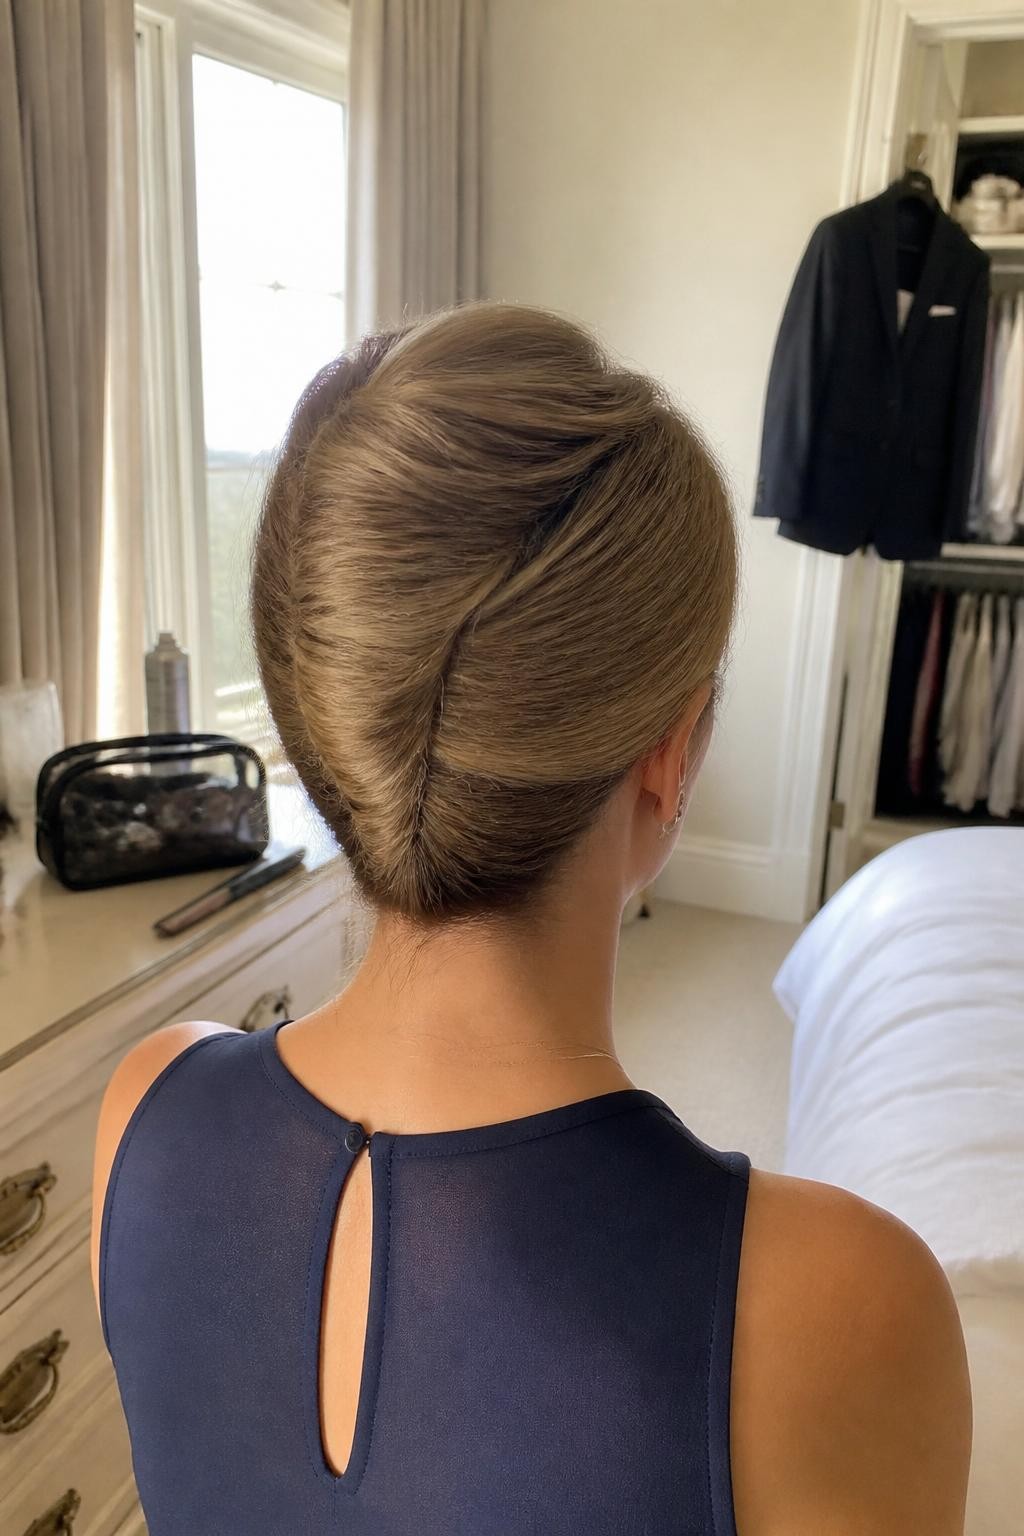
A polished French twist has a smooth upright shape with gentle volume at the crown. It is ideal for black-tie weddings, formal church ceremonies, and elegant evening receptions. The clean silhouette looks especially striking with long-sleeved dresses and structured fall fabrics.
What you need
- Dry texture spray for grip
- Fine-tooth comb for smoothing the surface
- Long bobby pins for securing the twist
- Tail comb for lifting the crown
- Firm-hold hairspray for lasting structure
How to style it
- Apply texture spray throughout the hair and lightly tease the crown.
- Smooth the outer layer and gather the hair toward one side at the back.
- Roll the length inward into a vertical twist and tuck the ends inside.
- Secure the roll with long pins, adjust the crown volume, and mist with hairspray.
7. Velvet Bow Half-Up Waves
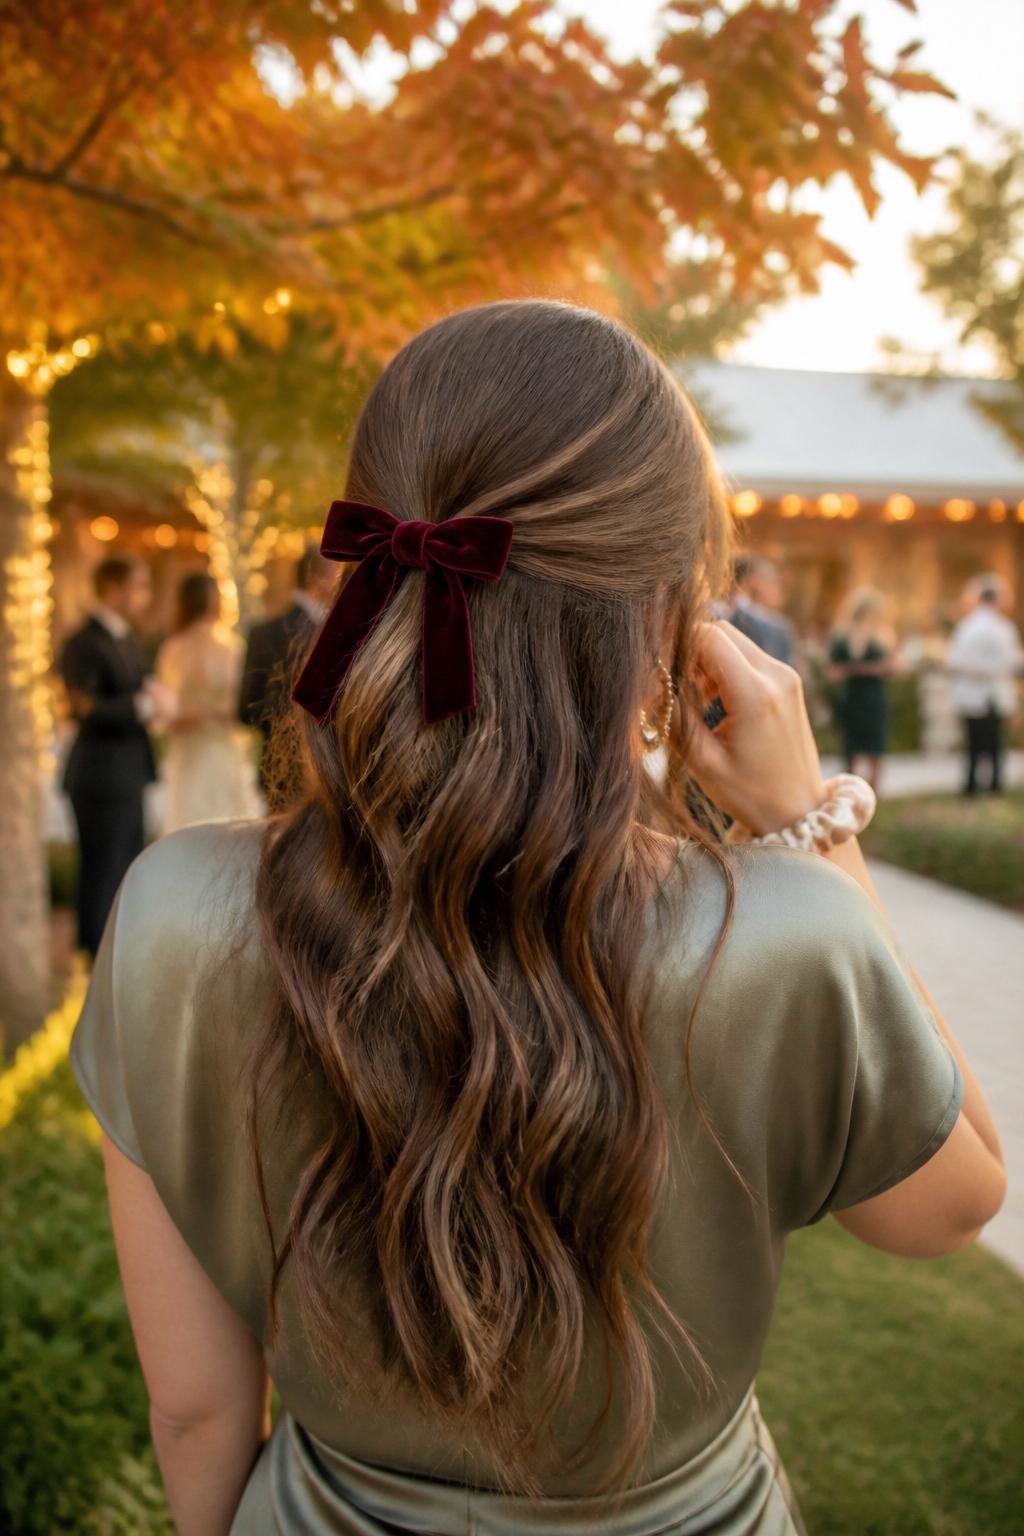
Velvet bow half-up waves combine soft movement with a rich seasonal accessory. The style is well suited to daytime ceremonies, country venues, and semi-formal weddings where a full updo may feel too dressy. A burgundy, forest green, navy, or chocolate bow adds a thoughtful fall touch.
What you need
- Heat protectant for preparing the hair
- Large curling wand for soft waves
- Clear elastic band for the half-up section
- Velvet bow barrette for decoration
- Lightweight hairspray for flexible hold
How to style it
- Apply heat protectant and curl the hair in large sections away from the face.
- Allow the waves to cool, then separate them gently with your fingers.
- Gather the top section from both temples and secure it at the back.
- Clip the velvet bow over the elastic and smooth the front pieces.
Quick tip: Choose a smaller bow for formal weddings and a slightly wider bow for relaxed outdoor celebrations.
8. Textured Bubble Ponytail
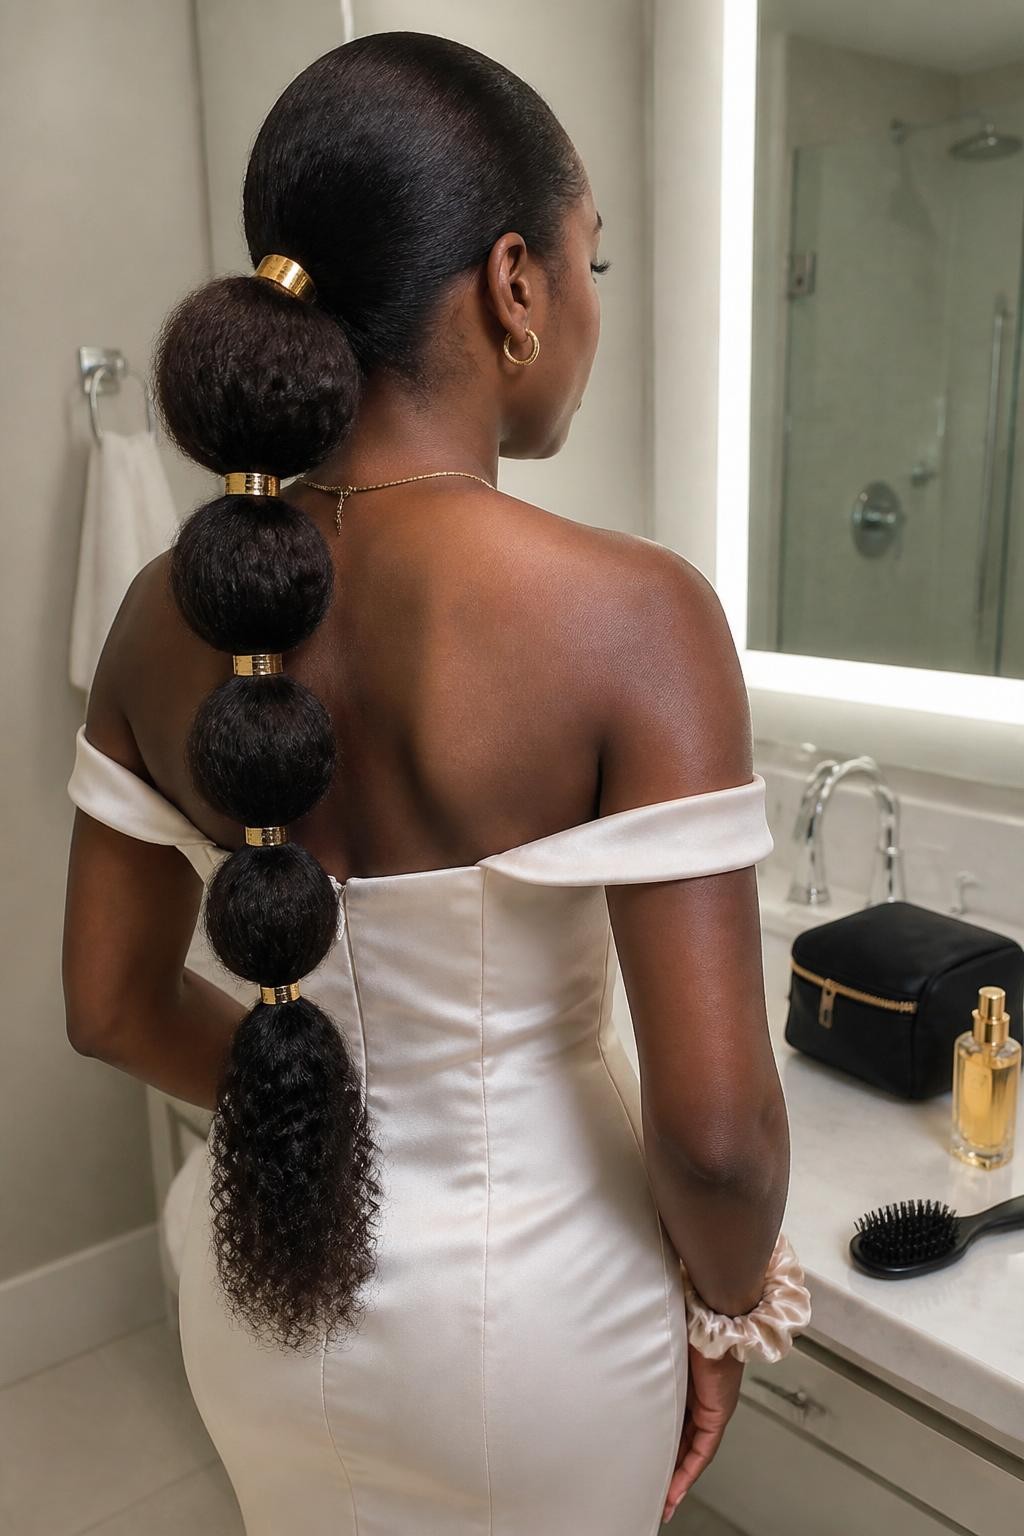
A textured bubble ponytail gives a familiar style a more striking and event-ready shape. It works well for long hair or an extension and remains secure during outdoor ceremonies and lively receptions. The rounded sections also look beautiful from the back in wedding photos.
What you need
- Smoothing cream for controlling the base
- Strong elastic band for the main ponytail
- Small clear elastics for creating the bubbles
- Hair extension for optional fullness
- Decorative cuffs for covering the elastics
How to style it
- Smooth the hair into a middle-height ponytail and secure it firmly.
- Add an extension if more length or fullness is needed.
- Place small elastics down the ponytail at even spaces and pull each section outward.
- Cover the elastics with decorative cuffs or thin wrapped pieces of hair.
9. Loose Low Ponytail with Face-Framing Curls
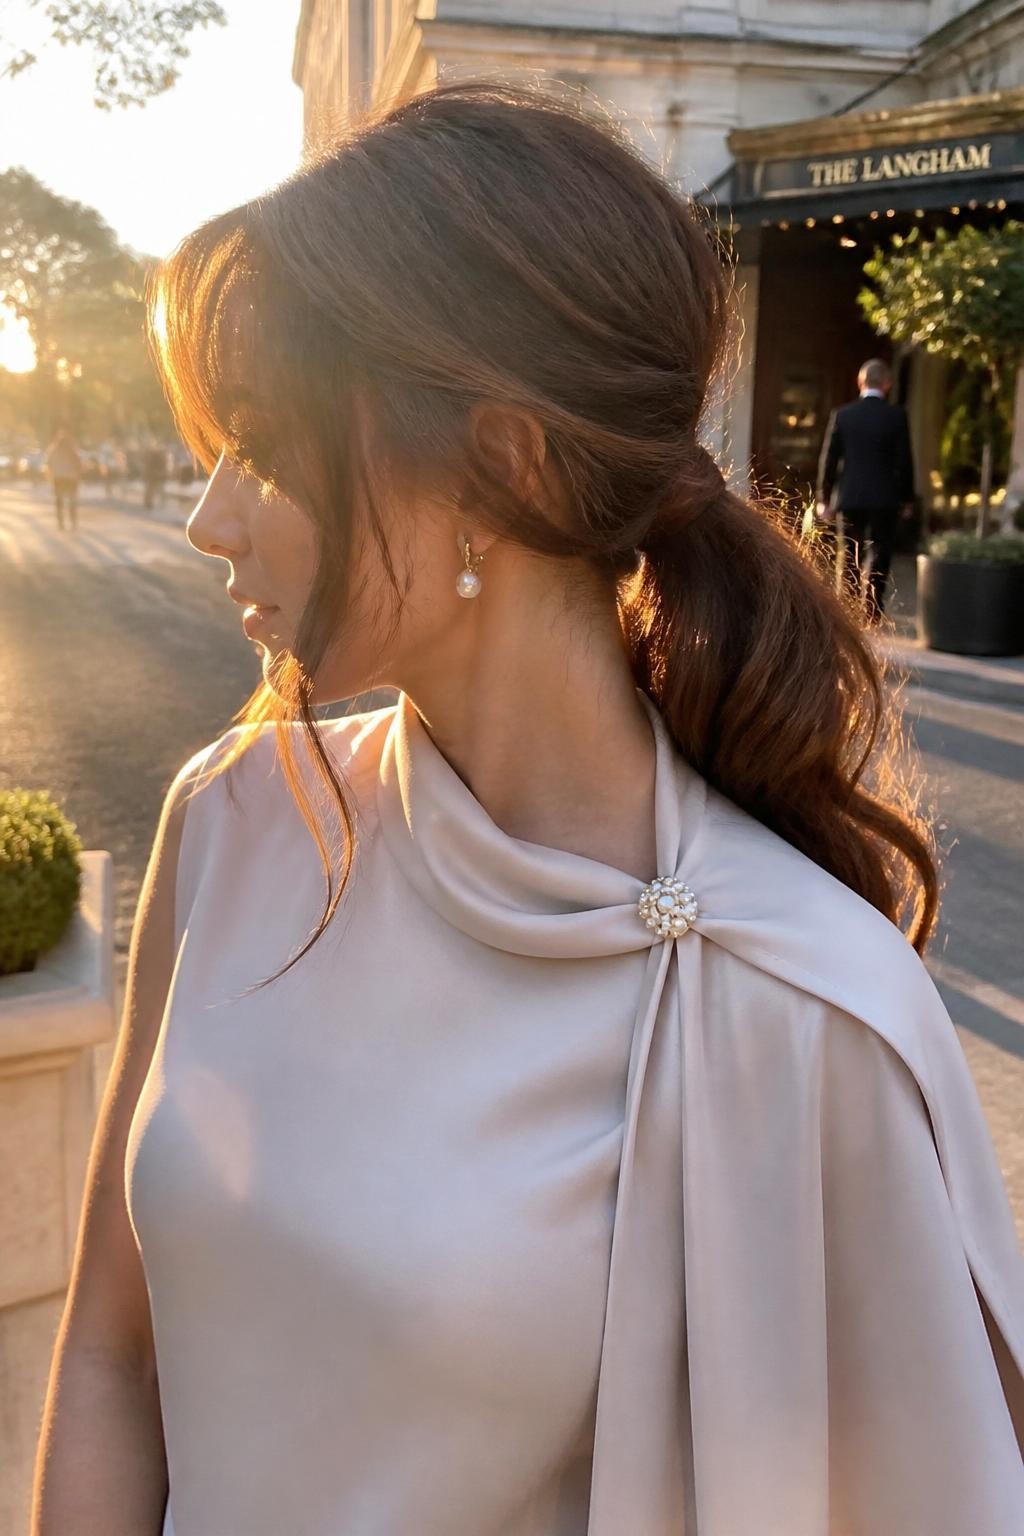
A loose low ponytail with face-framing curls has a soft, polished finish that does not feel too formal. It is ideal for romantic dresses, long sleeves, and wedding venues with a relaxed dress code. The lower placement also stays comfortable if you plan to wear a coat between the ceremony and reception.
What you need
- Volumizing mousse for body at the crown
- Curling iron for shaping the lengths
- Clear elastic band for securing the ponytail
- Bobby pins for hiding the base
- Flexible hairspray for movement
How to style it
- Apply mousse and curl the hair in medium sections.
- Leave two pieces free near the face and gather the remaining hair at the nape.
- Secure the ponytail loosely and wrap a small piece of hair around the elastic.
- Curl the face-framing pieces, loosen the crown slightly, and mist with hairspray.
10. Twisted Natural Hair Halo
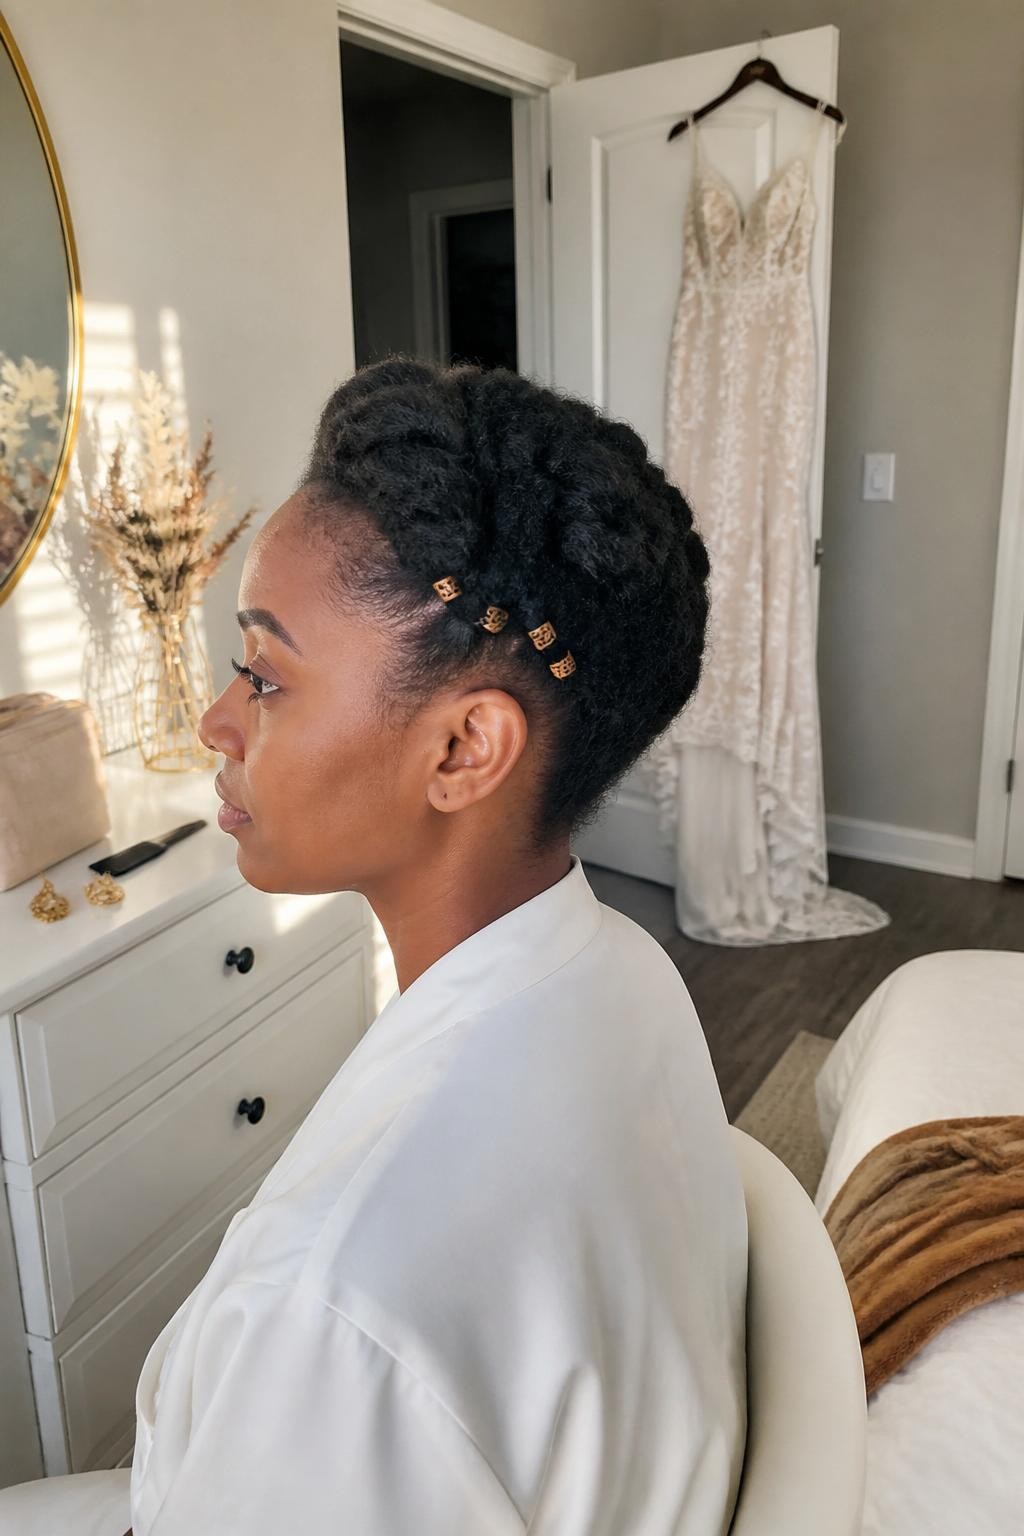
A twisted natural hair halo creates a soft crown around the head while keeping the ends protected. It is a beautiful option for fall weddings when you want to wear your natural texture in a neat, lasting style. The raised shape pairs well with statement earrings and dresses with detailed shoulders.
What you need
- Leave-in conditioner for moisture
- Twist cream for softness and control
- Rat-tail comb for making clean sections
- Bobby pins for tucking the ends
- Bronze hair cuffs for a seasonal detail
How to style it
- Apply leave-in conditioner and twist cream to stretched natural hair.
- Create two large flat twists, beginning near the front and working toward the back.
- Cross the loose ends around the opposite sides of the head to form a halo.
- Tuck and pin the ends, then add a few bronze cuffs along the twists.
Quick tip: Complete the style on lightly stretched hair so the twists look full and remain easier to shape.
11. Pearl-Pinned Wavy Bob
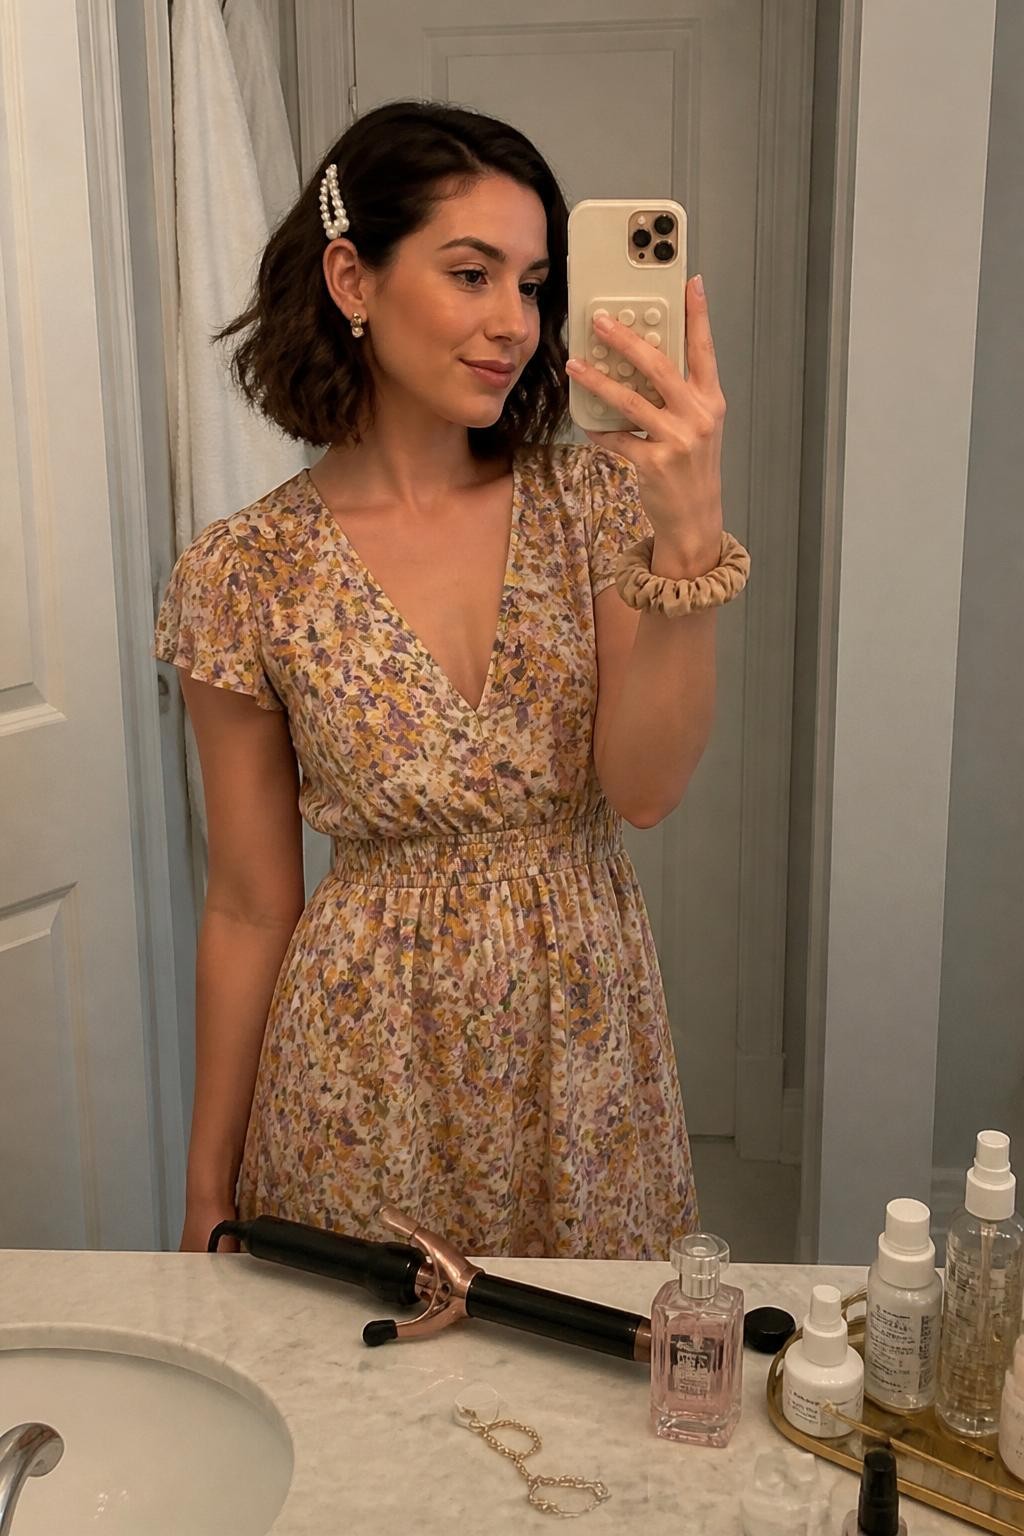
A pearl-pinned wavy bob brings soft texture and a small formal detail to shorter hair. It works well for chin-length and shoulder-length cuts that cannot be gathered into a full updo. The side placement also keeps the style neat if the ceremony is outdoors.
What you need
- Heat protectant for preparing the bob
- Medium curling wand for loose bends
- Wide-tooth comb for soft separation
- Pearl barrette or individual pearl pins
- Lightweight hairspray for hold
How to style it
- Apply heat protectant and create a soft side part.
- Curl small sections, alternating directions for relaxed movement.
- Comb through the waves lightly and tuck the smaller side behind the ear.
- Secure the tucked section with a pearl barrette and mist with hairspray.
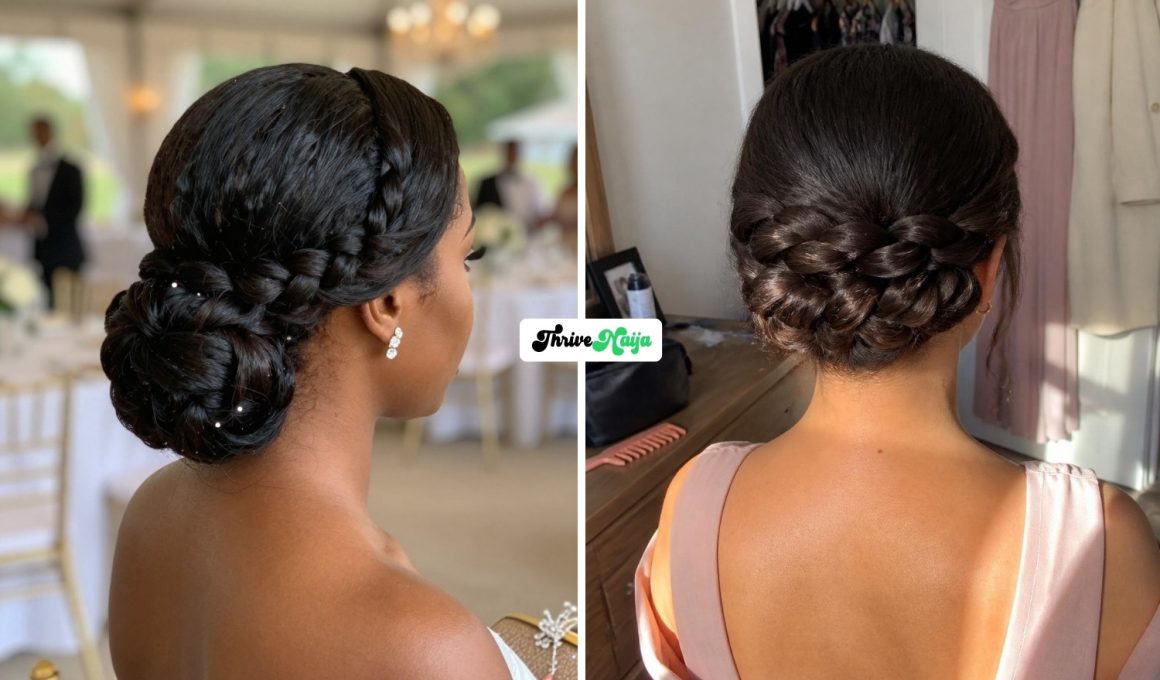
12. Sleek Braided Low Bun
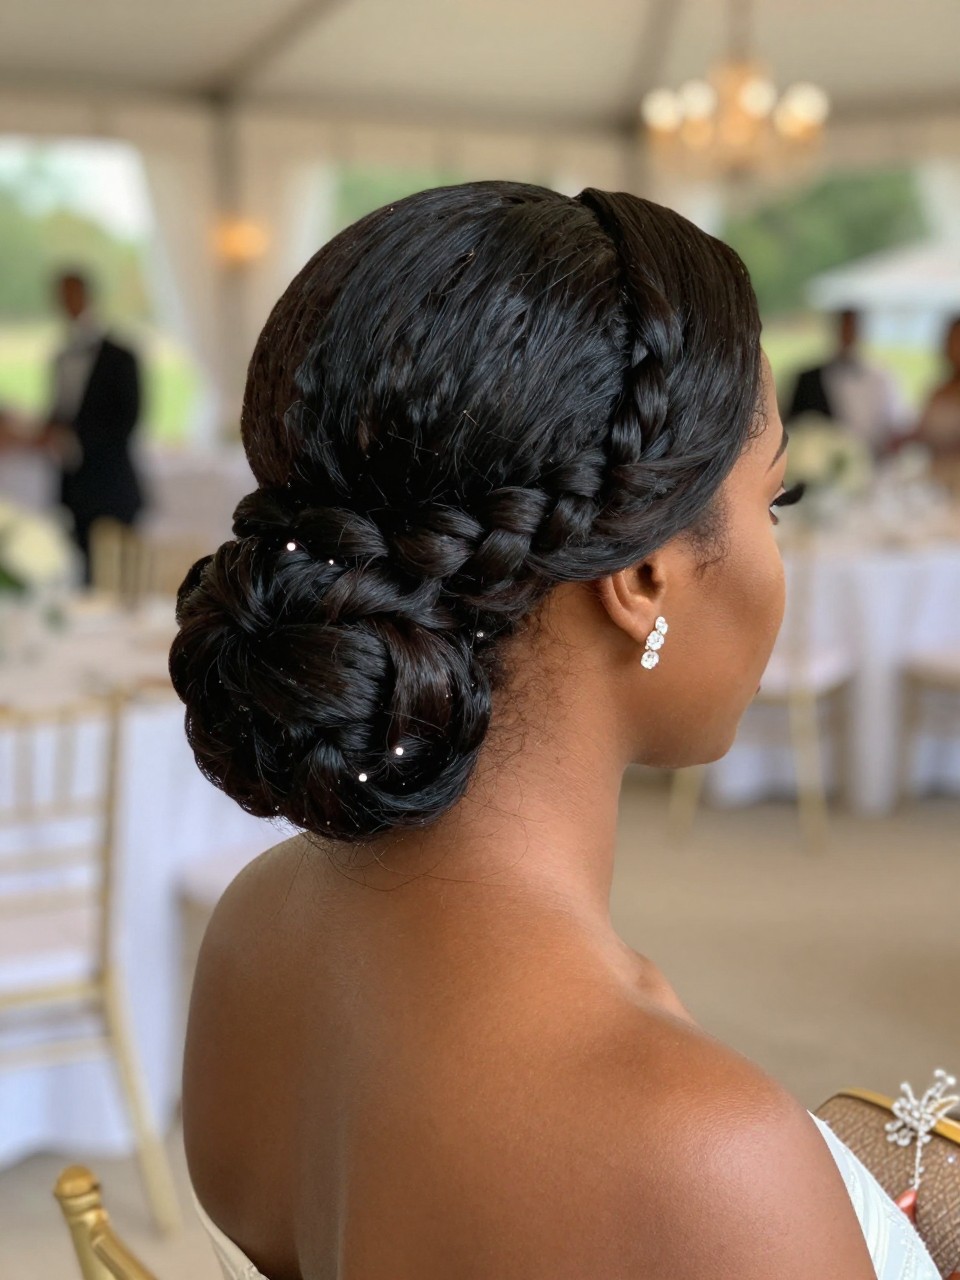
A sleek braided low bun combines a smooth base with a thick braid wrapped neatly at the nape. It is polished enough for formal ceremonies while remaining secure throughout a long reception. The low bun also looks clean with high-neck dresses, shawls, and tailored jumpsuits.
What you need
- Styling gel for smoothing the base
- Boar-bristle brush for gathering the hair
- Strong elastic band for support
- Braiding extension for added fullness
- Bobby pins for securing the bun
How to style it
- Apply styling gel and brush the hair into a low ponytail.
- Attach braiding hair to the base and create one thick three-strand braid.
- Wrap the braid around itself to form a wide low bun.
- Pin the bun securely and smooth the hairline with a small edge brush.
13. Soft Curly Faux Bob
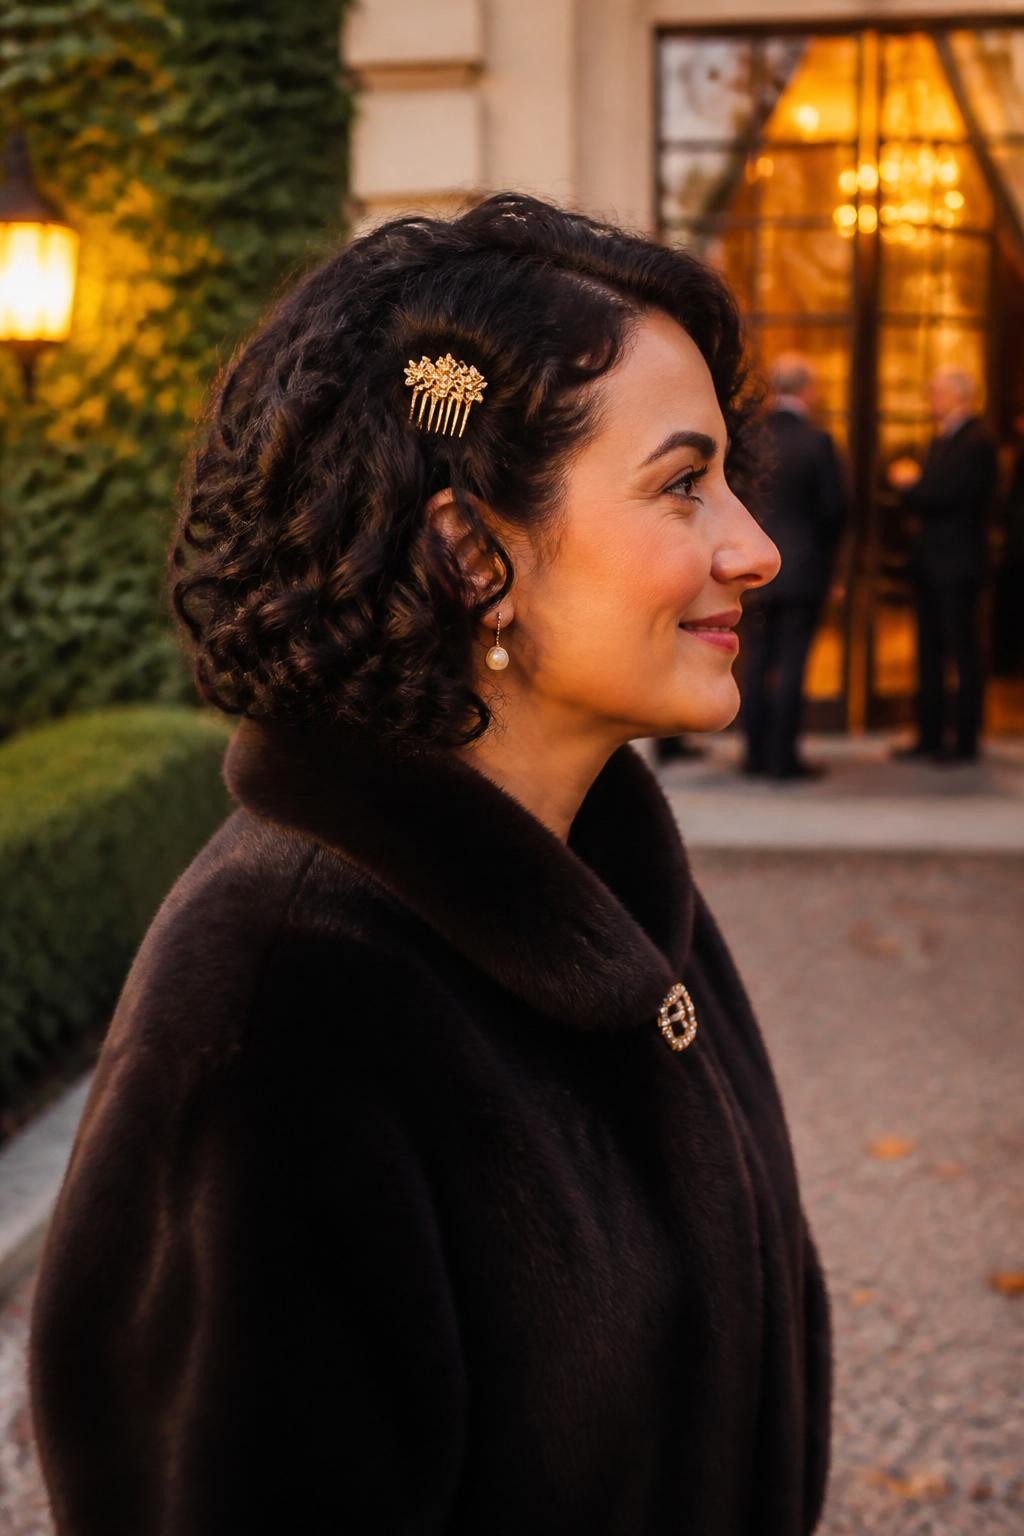
A soft curly faux bob allows you to enjoy a shorter, fuller shape without cutting long hair. It suits vintage-inspired dresses, cocktail weddings, and formal events where you want something different from loose curls. The tucked length also stays safely above coat collars.
What you need
- Curling iron for creating full curls
- Small elastic band for securing the ends
- Bobby pins for forming the faux bob
- Texturizing spray for extra hold
- Decorative side comb for optional detail
How to style it
- Curl the full head in medium sections and allow the curls to cool.
- Gather the ends into a loose low ponytail with a small elastic.
- Roll the ponytail underneath and pin it across the nape.
- Pull the upper curls outward to create a rounded bob and add a side comb.
14. Modern Rope-Braid Updo
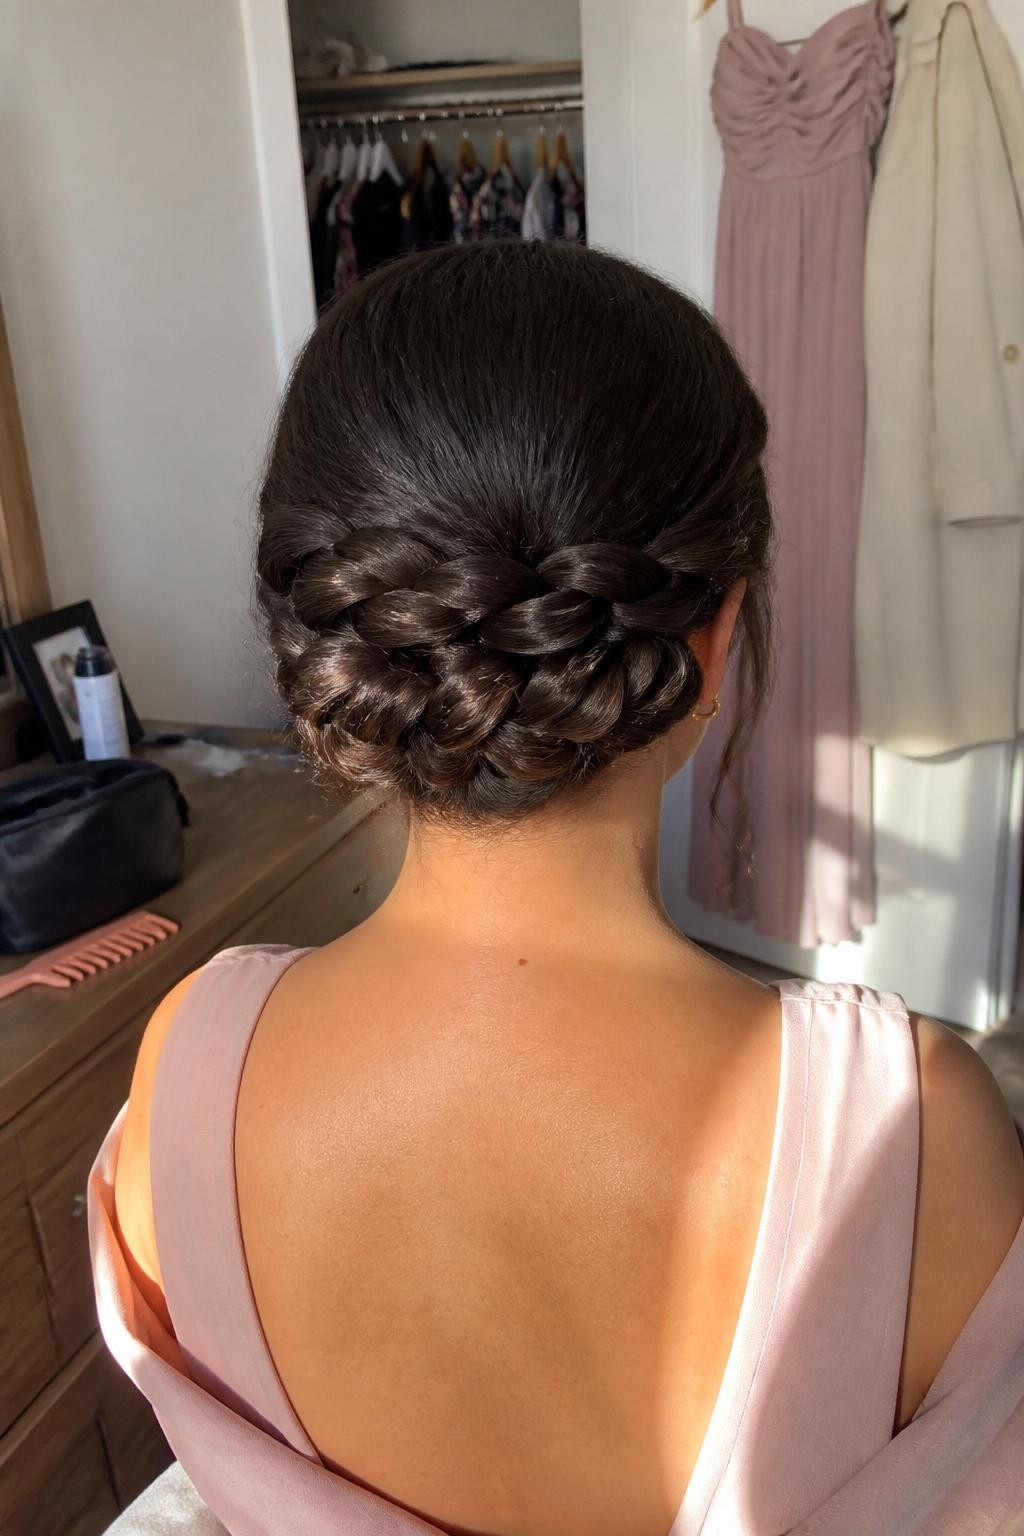
A modern rope-braid updo uses thick twisted sections to create an artistic shape at the back of the head. It is a stylish choice for evening ceremonies, fashion-forward outfits, and weddings with a formal dress code. The structured finish looks detailed while keeping every strand away from the face and neckline.
What you need
- Smoothing cream for controlling the hair
- Clear elastic bands for securing each twist
- Bobby pins for shaping the updo
- Tail comb for creating clean sections
- Strong-hold hairspray for lasting support
How to style it
- Smooth the hair back and divide it into three low ponytails.
- Split each ponytail into two pieces and twist them together to create rope braids.
- Loop the braids around one another and pin them into a wide textured updo.
- Hide the ends, adjust the loops evenly, and finish with hairspray.
Quick tip: Build the updo from separate ponytails rather than one large section so the finished loops are easier to control.