

Table of Contents Show
Fall weather can leave textured hair feeling dry, frizzy, or harder to manage, especially when scarves, hats, and changing temperatures become part of your daily routine. The right hairstyle can protect your strands while still helping you feel polished for work, weekends, special events, and relaxed days at home.
Tired of Natural Hair Breakage, Shrinkage & Tangles?
If your natural hair is always breaking, shrinking up, or taking forever to detangle, this ebook is for you. Learn simple ways to stop the damage and make wash days easier.
These beautiful fall hairstyles for Black women include warm seasonal colors, protective options, natural textures, and simple looks that will make getting ready much easier.
1. Copper-Tipped Knotless Braids
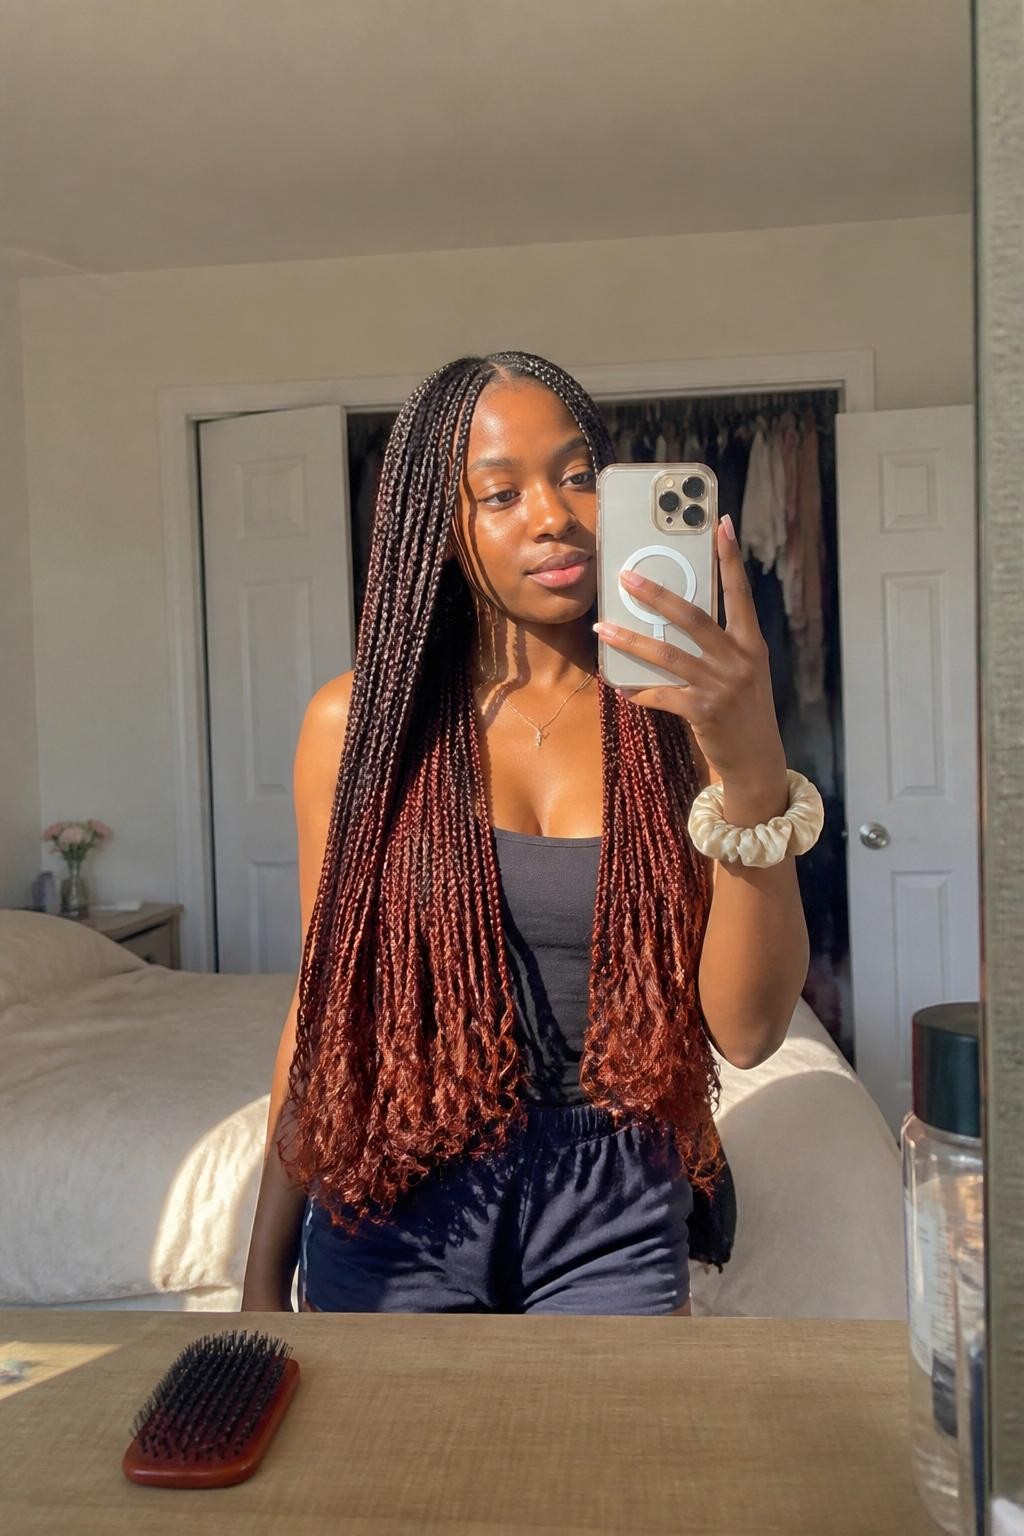
Copper-tipped knotless braids bring a warm seasonal touch to a classic protective style. They work especially well for women who want several weeks of easy styling without placing too much tension around the hairline. The rich copper ends also pair beautifully with brown coats, cream sweaters, and other fall clothing.
What you need
- Pre-stretched braiding hair in black and copper for the two-tone finish
- Rat-tail comb for making clean sections
- Braiding gel to smooth the roots and control flyaways
- Hair mousse to set the finished braids
- Small scissors for trimming loose strands
How to style it
- Clean, moisturize, and stretch your natural hair before dividing it into neat sections.
- Begin each braid with your natural hair, gradually feeding in black braiding hair without creating a tight knot.
- Add copper hair near the lower third of each braid and continue braiding to the ends.
- Apply mousse over the braids, trim loose hairs, and tie them down with a satin scarf until dry.
Quick tip: Sleep with the braids inside a large satin bonnet to help the copper ends stay smooth.
2. Fluffy Twist-Out with Deep Side Part
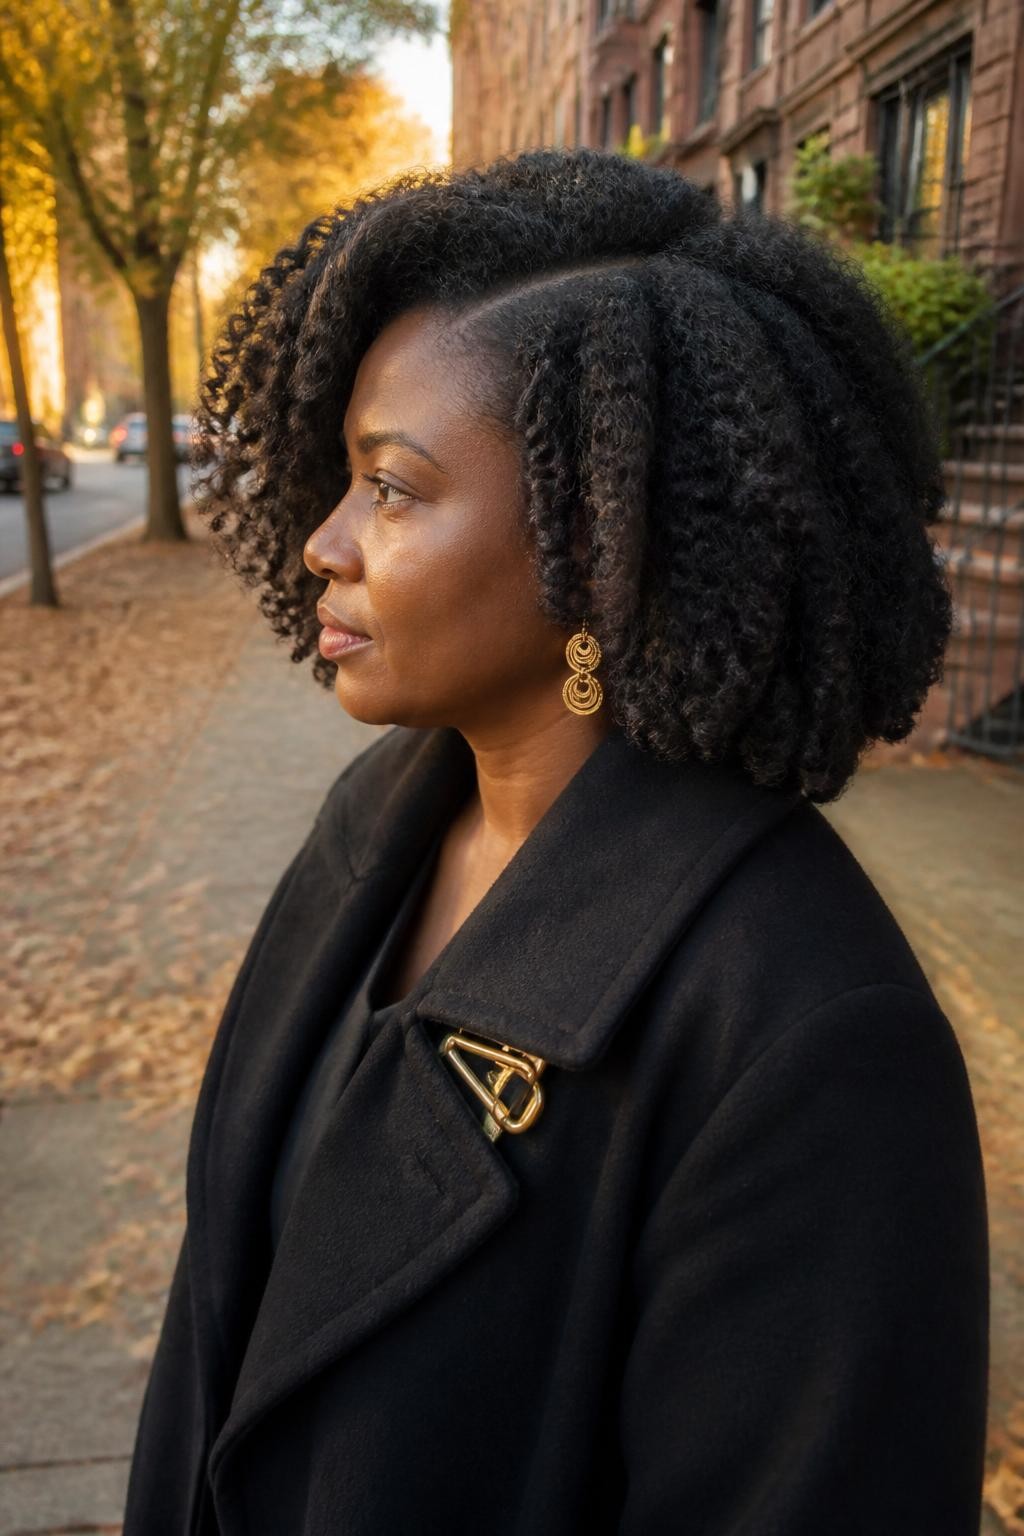
A fluffy twist-out with a deep side part gives natural hair soft shape, full movement, and an effortless fall finish. It is a helpful choice for medium-length or long hair that needs definition without looking overly styled. The side part also makes the look feel polished enough for brunch, work, or an autumn date.
What you need
- Leave-in conditioner for softness and moisture
- Curl cream to help each twist hold its shape
- Lightweight styling gel for extra definition
- Wide-tooth comb for gentle detangling
- Hair pick for lifting the roots
How to style it
- Divide clean, damp hair into medium sections and apply leave-in conditioner from roots to ends.
- Smooth curl cream and a small amount of gel through each section before creating two-strand twists.
- Allow the twists to dry fully, then coat your fingertips with a little oil and carefully unravel them.
- Create a deep side part, separate the curls for fullness, and lift the roots gently with a hair pick.
Quick tip: Complete the twists at night so they have enough time to dry without using high heat.
3. Sleek Low Bubble Ponytail
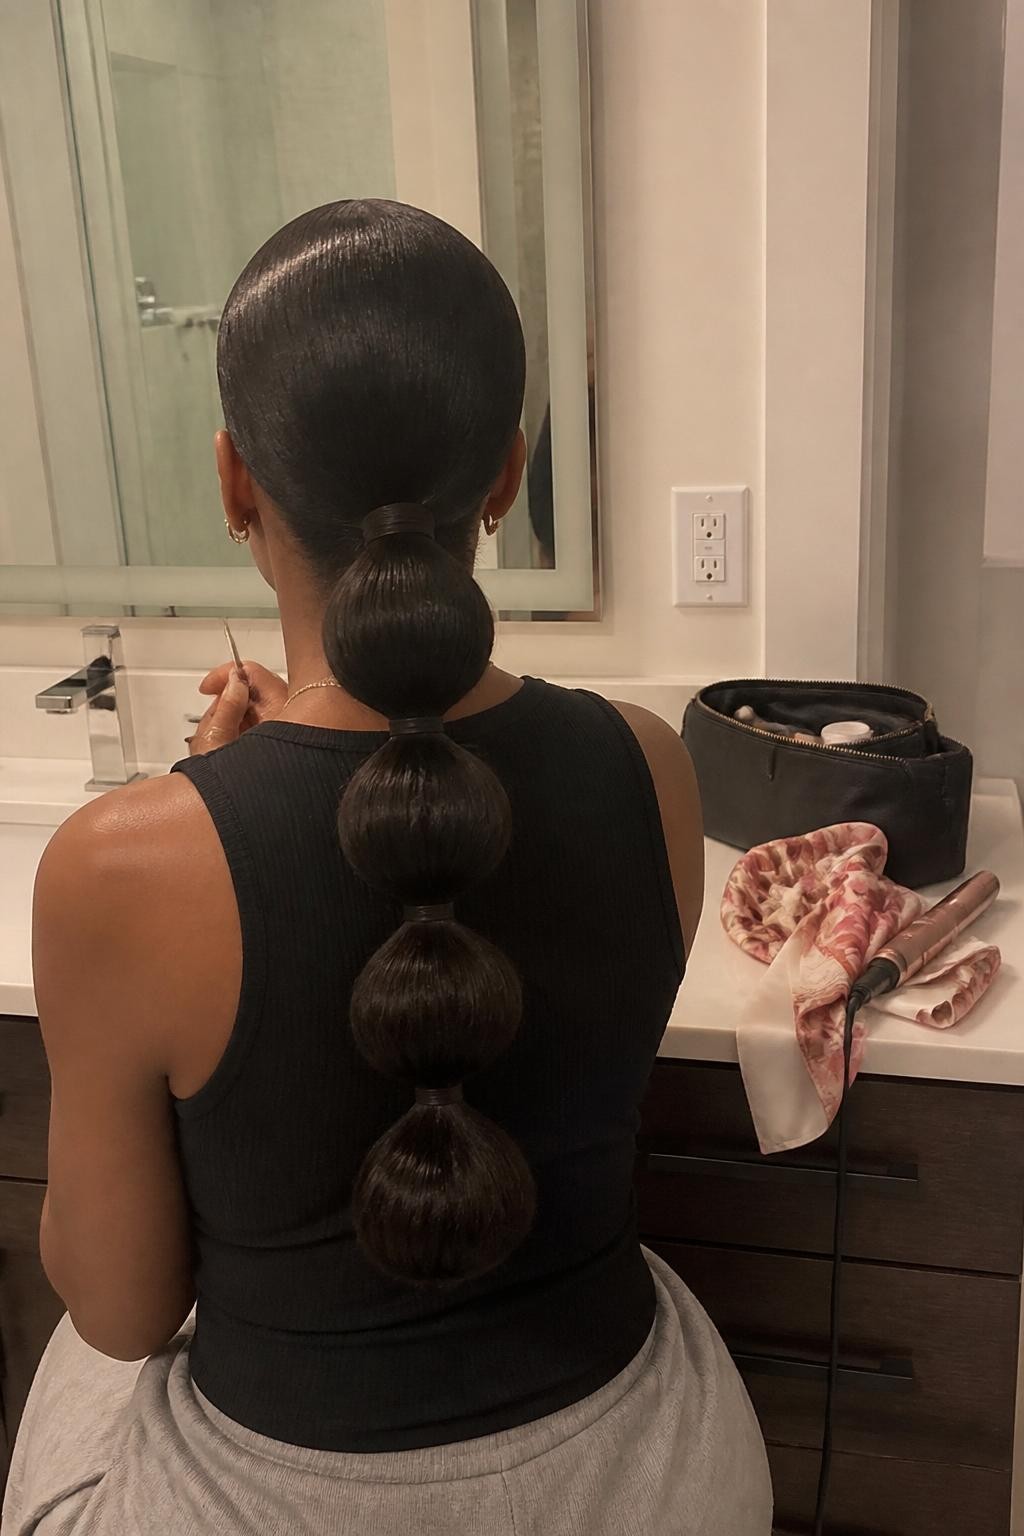
The sleek low bubble ponytail combines a smooth base with rounded sections that create a playful but grown-up finish. It works well for stretched natural hair, relaxed hair, or a ponytail extension when you need a quick style for work or dinner. Because the ponytail sits low, it remains comfortable under heavier fall coats and scarves.
What you need
- Strong-hold styling gel for a smooth base
- Boar-bristle brush to guide the hair into place
- Long ponytail extension for added length
- Small elastic bands for forming the bubbles
- Satin scarf to set the roots
How to style it
- Apply a small amount of gel to stretched hair and brush it toward the nape.
- Secure the hair in a low ponytail, then attach the extension around the base.
- Place small elastic bands down the ponytail at even spaces and gently pull each section outward.
- Wrap a small piece of hair around the first elastic and smooth the base with a satin scarf.
Quick tip: Use snag-free elastic bands so the ponytail can be removed without pulling or breaking the extension hair.
4. Chunky Flat-Twist Crown
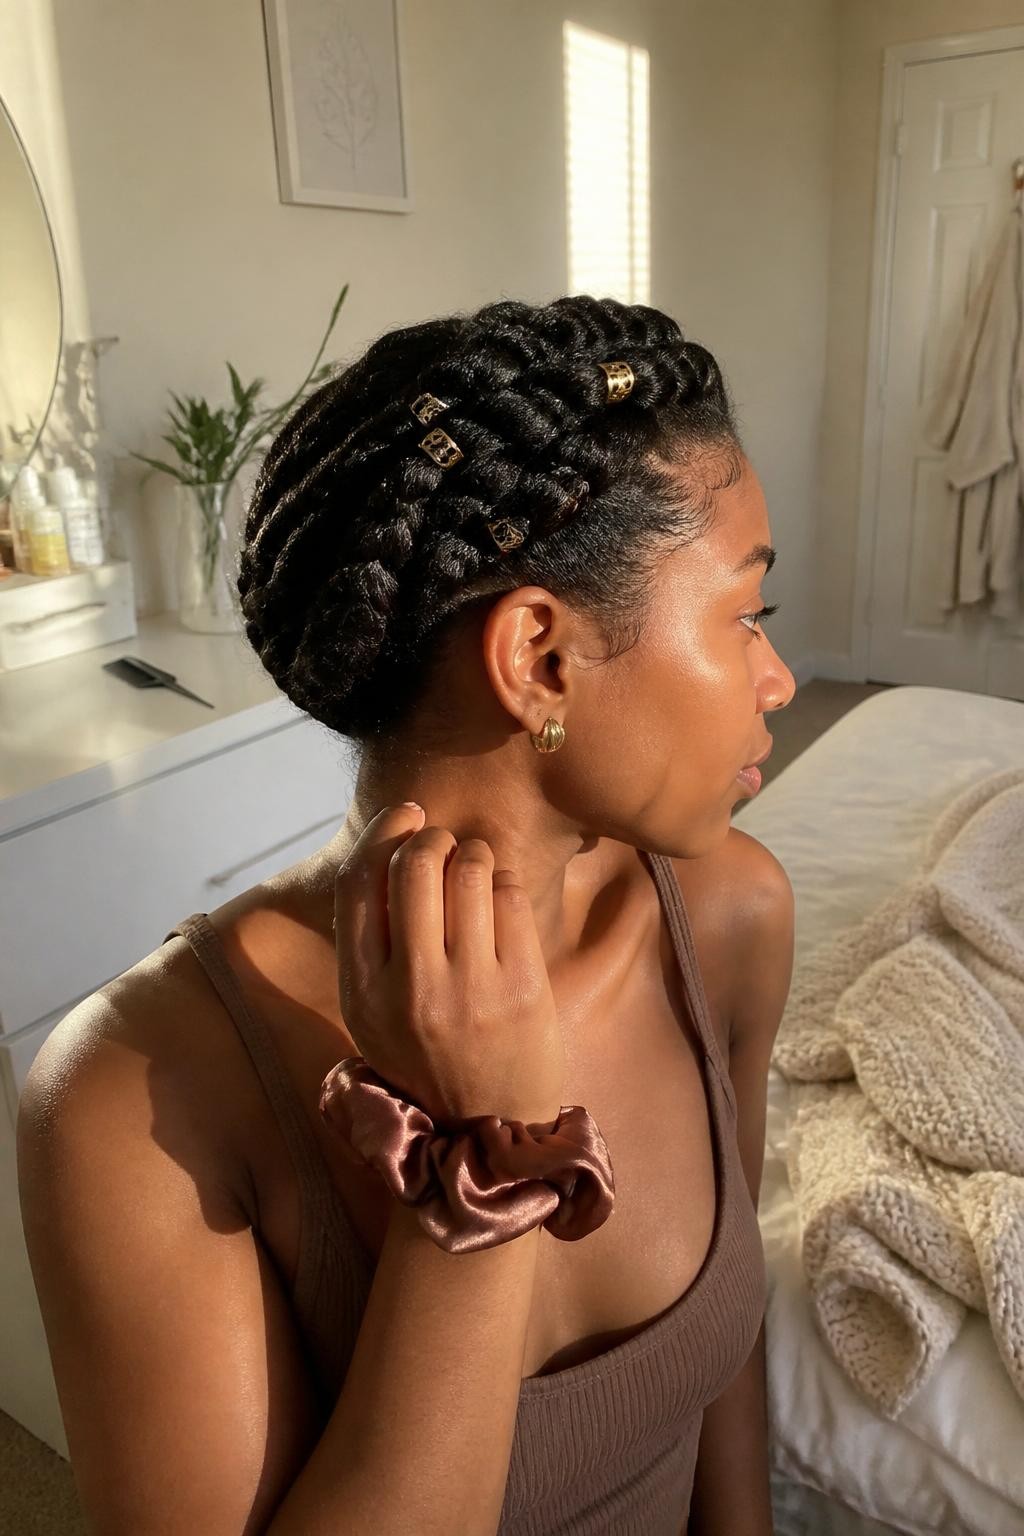
A chunky flat-twist crown circles the head with soft texture while keeping the ends neatly protected. It is a lovely option for busy fall mornings, rainy days, or occasions when you want your hair away from high collars. The style works best on medium-length natural hair that has been lightly stretched.
What you need
- Moisturizing cream to soften the hair
- Edge control for cleaning up the hairline
- Rat-tail comb for creating the crown section
- Bobby pins for tucking the ends
- Decorative hair cuffs for a seasonal accent
How to style it
- Apply moisturizer to stretched hair and create a circular part that follows the shape of your head.
- Begin near one ear and flat twist the hair around the head, adding small sections as you move.
- Continue until the twist reaches the starting point, then tuck the loose end underneath the crown.
- Secure the end with bobby pins, smooth the edges, and add two or three hair cuffs.
5. Shoulder-Length Passion Twists
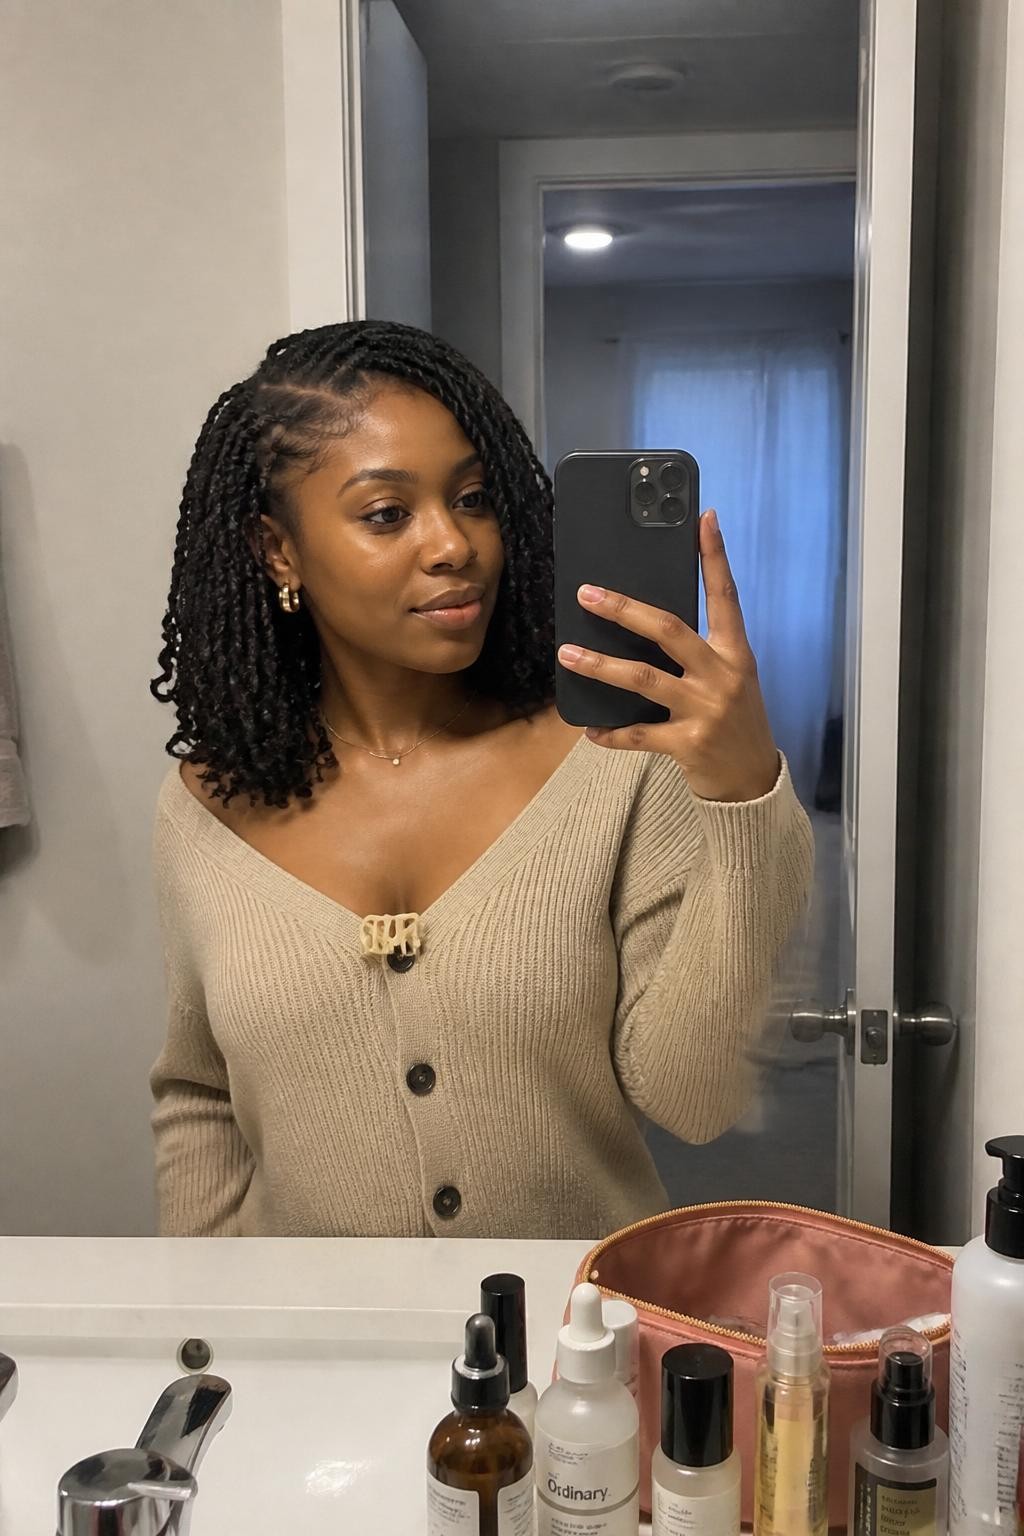
Shoulder-length passion twists have a soft, slightly undone texture that looks relaxed without becoming messy. They are ideal for women who want a lightweight protective style that will not get caught inside coat collars. Their shorter length also makes washing, moisturizing, and nighttime care much easier.
What you need
- Water-wave extension hair for the loose texture
- Leave-in spray to moisturize your natural hair
- Braiding gel for neat sections
- Crochet needle for installing the twists
- Hair mousse to reduce frizz
How to style it
- Moisturize your hair and divide it into medium box-shaped sections.
- Braid each section a short distance, then crochet water-wave hair through the base.
- Twist the extension hair together with your natural hair, stopping around shoulder length.
- Separate the ends slightly, trim uneven pieces, and smooth mousse over the finished style.
Quick tip: Choose medium sections instead of very small ones to keep the style light and quicker to install.
6. Curly High Puff with Printed Headband
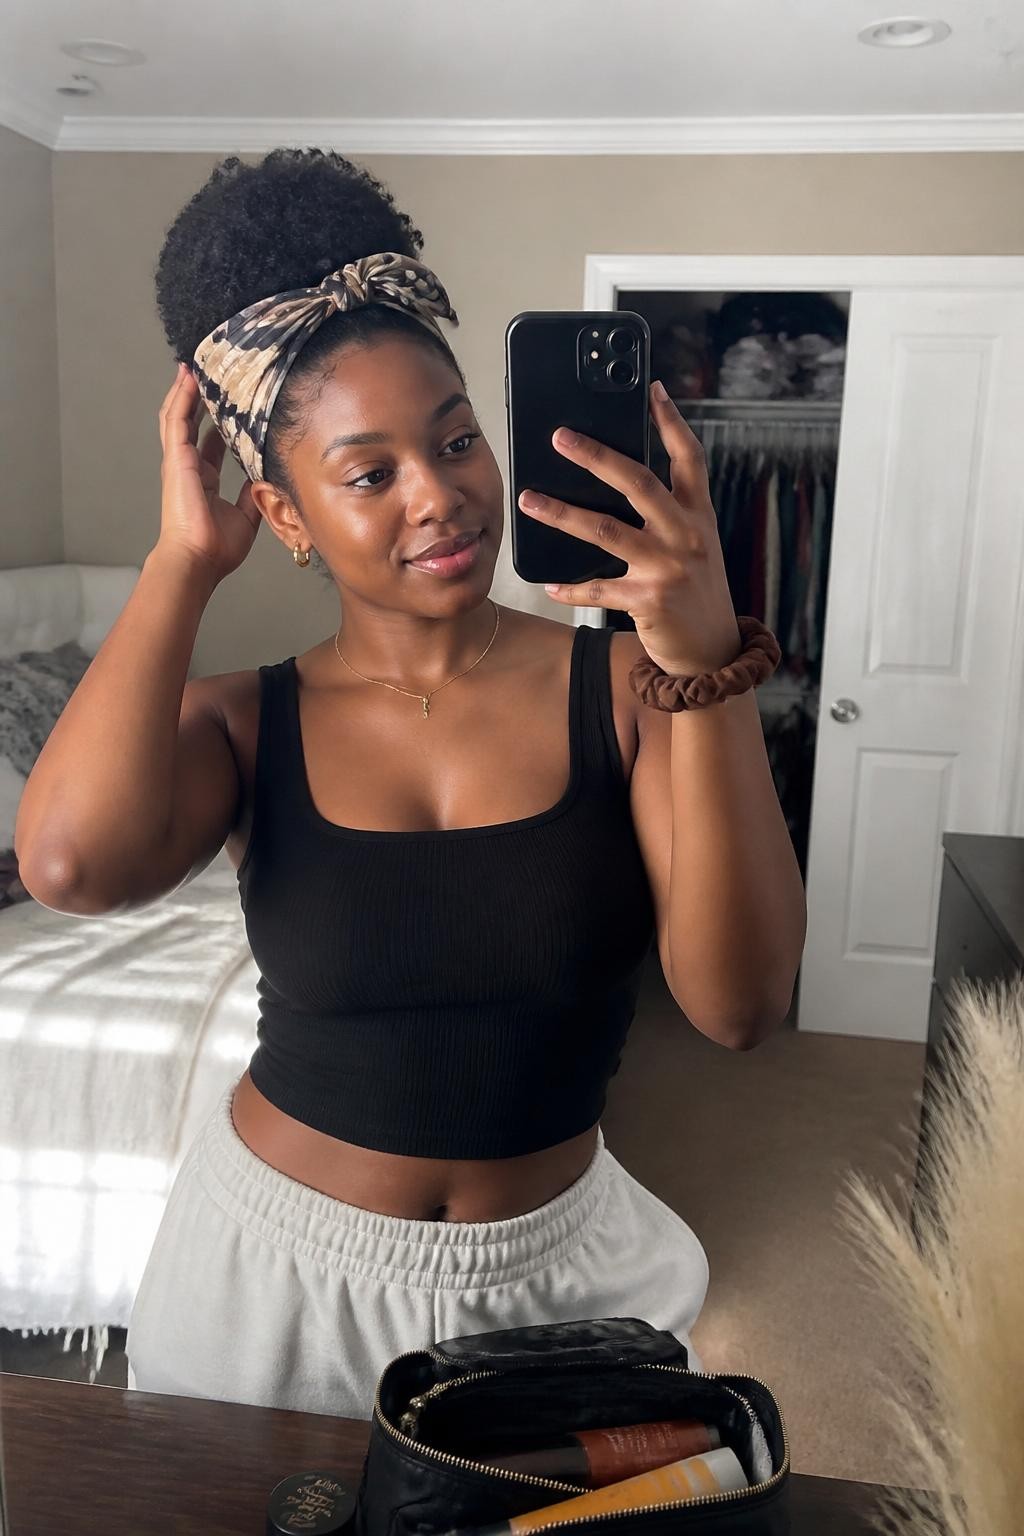
A curly high puff with a printed headband is cheerful, simple, and perfect for showing off natural texture. It is especially useful for second-day curls or an older wash-and-go that needs a fresh shape. A rust, olive, plaid, or deep floral headband can make the style feel right for fall in seconds.
What you need
- Spray bottle filled with water for refreshing the curls
- Leave-in conditioner for softness
- Wide elastic band for creating the puff
- Printed fabric headband for covering the base
- Edge brush for light hairline styling
How to style it
- Mist the hair lightly with water and work a small amount of leave-in conditioner through dry areas.
- Brush the sides upward while keeping the curls at the crown loose and full.
- Slide a wide elastic band around the head and gently push it upward to form the puff.
- Tie the printed headband around the base, fluff the curls, and smooth only the areas that need it.
7. Side-Swept Braided Bob
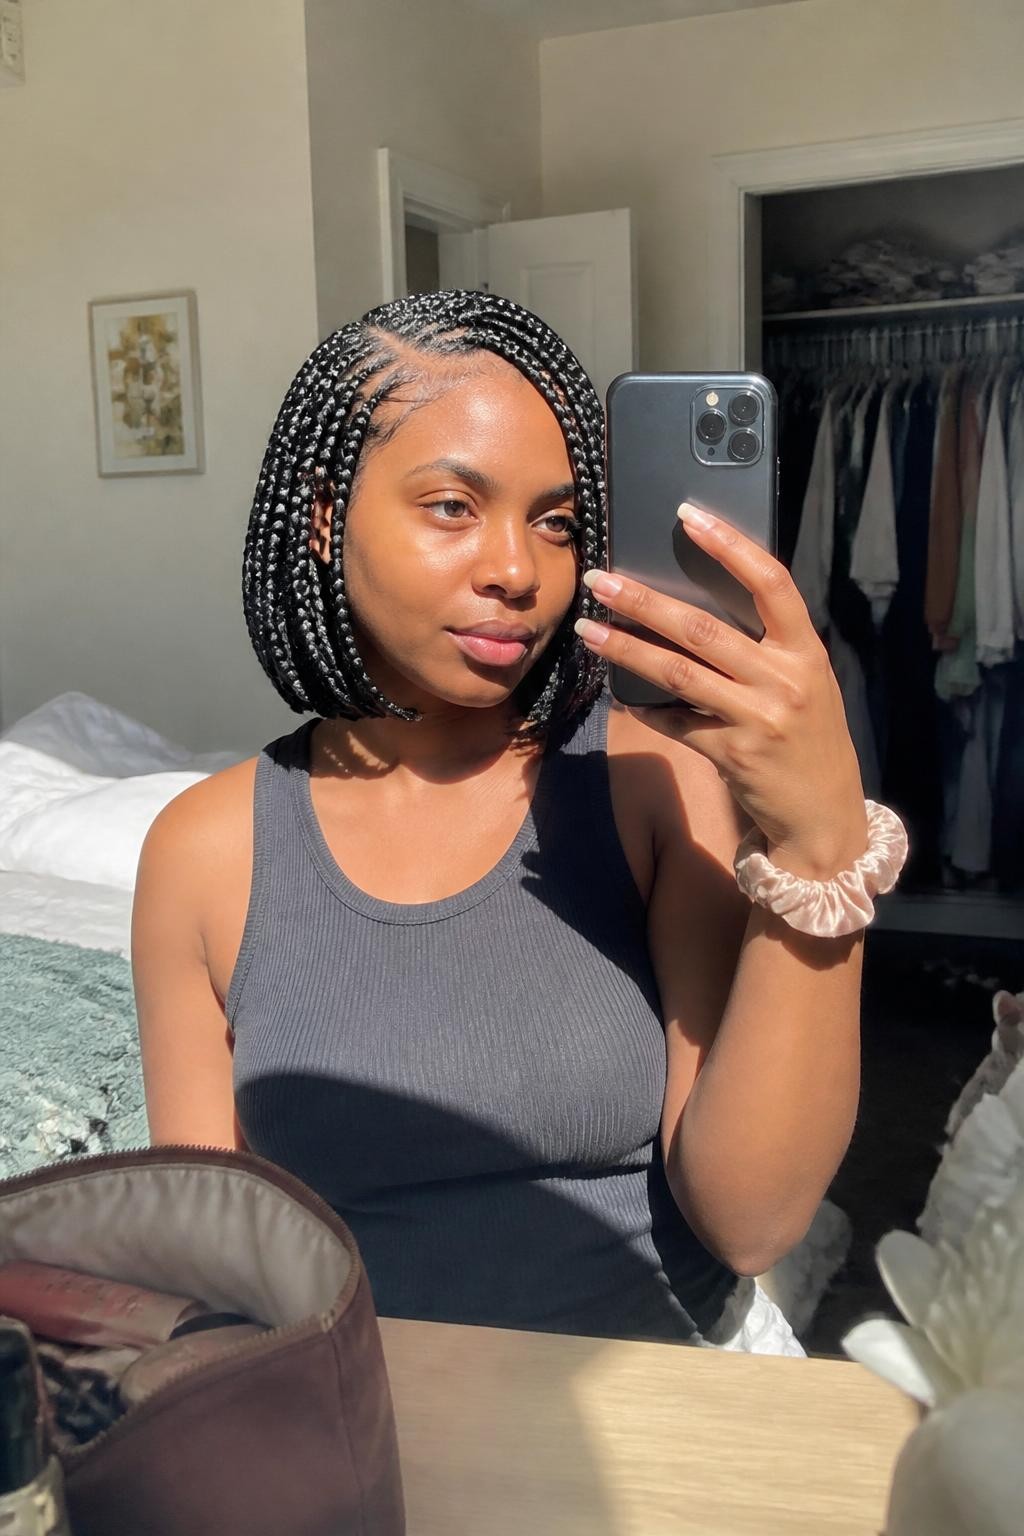
A side-swept braided bob feels neat, modern, and easy to manage during cooler weather. It works well for anyone who likes box braids but prefers a shorter style that stays clear of scarves and thick sweaters. The angled side part gives the bob a softer finish around the face.
What you need
- Pre-stretched braiding hair for smooth braids
- Rat-tail comb for precise sections
- Braiding gel for controlling the roots
- Small rubber bands if the ends need extra hold
- Hair mousse for setting the bob
How to style it
- Prepare clean, stretched hair and create a deep side part.
- Divide the remaining hair into small or medium sections and apply braiding gel to each root.
- Feed in braiding hair and braid each section until it reaches chin or shoulder length.
- Seal the ends safely, apply mousse, and sweep the fuller side across the forehead.
Quick tip: Ask for lightweight braiding hair so the shorter braids move naturally instead of feeling stiff.
8. Soft Locs Half-Up Bun
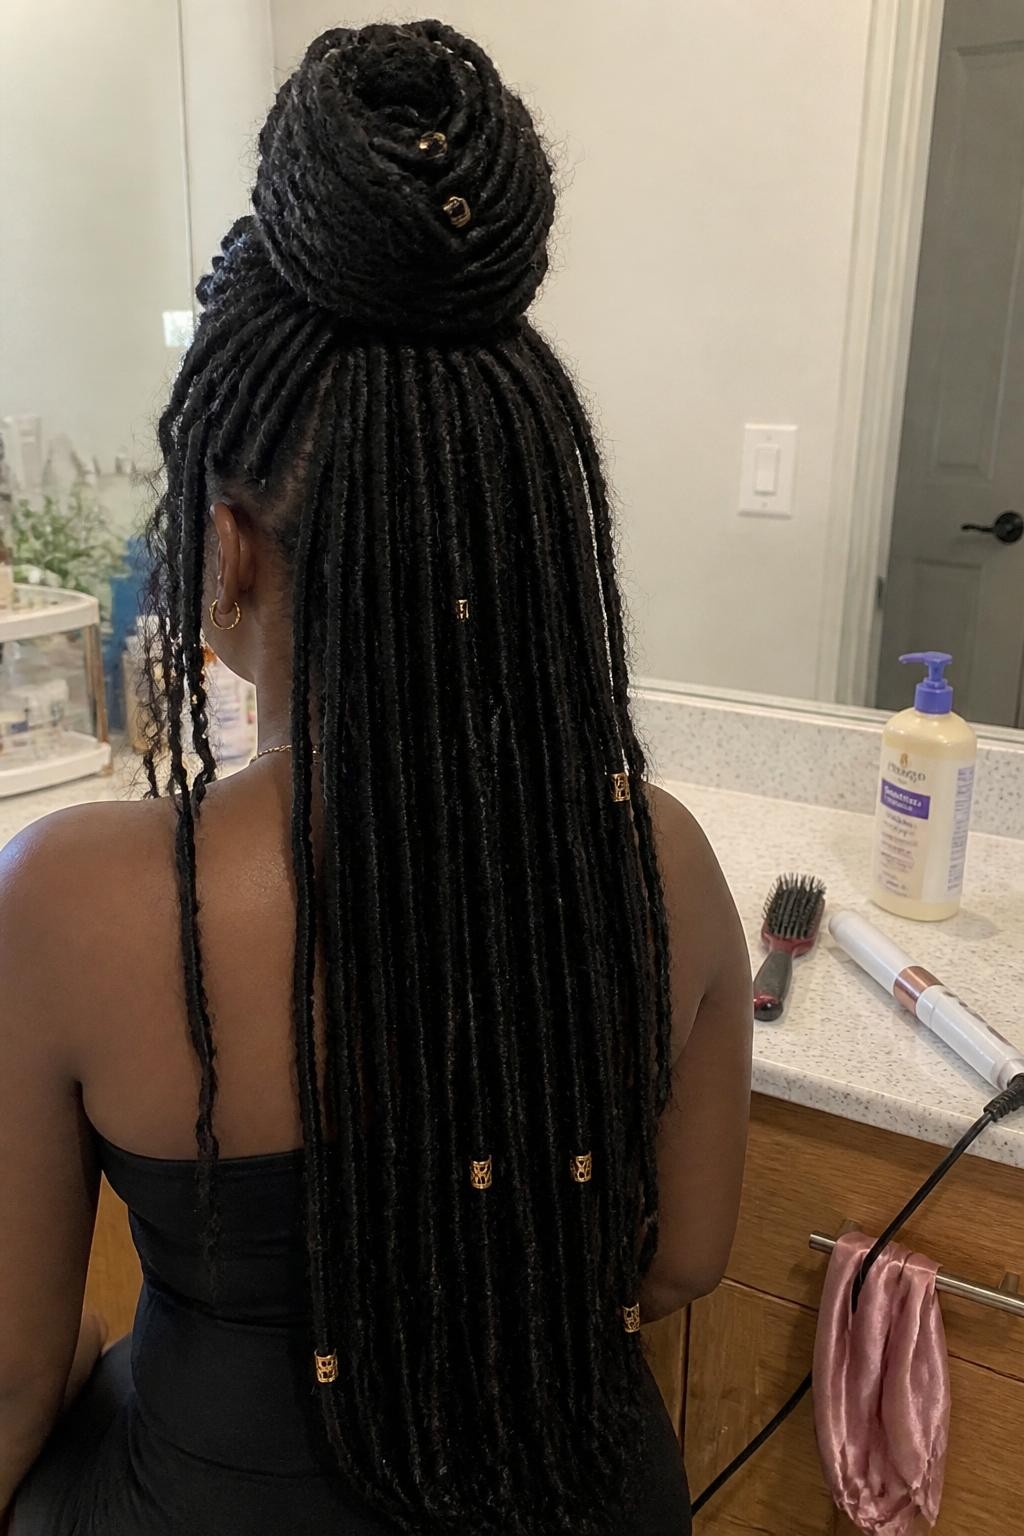
Soft locs styled in a half-up bun create height at the crown while leaving plenty of length flowing down the back. This look is useful when you want to change your protective style without taking it down or adding heat. It also keeps locs away from the face on windy fall days.
What you need
- Installed soft locs as the base
- Large fabric hair tie for gentle hold
- A few bobby pins for shaping the bun
- Lightweight braid spray for moisture
- Gold loc cuffs for decoration
How to style it
- Refresh the scalp and lengths with a light braid spray.
- Separate the locs from temple to temple and gather the top section at the crown.
- Twist the gathered locs loosely around their base to form a wide bun.
- Secure the bun with pins, loosen it slightly, and place a few cuffs along the hanging locs.
9. Tucked Low Roll on Stretched Hair
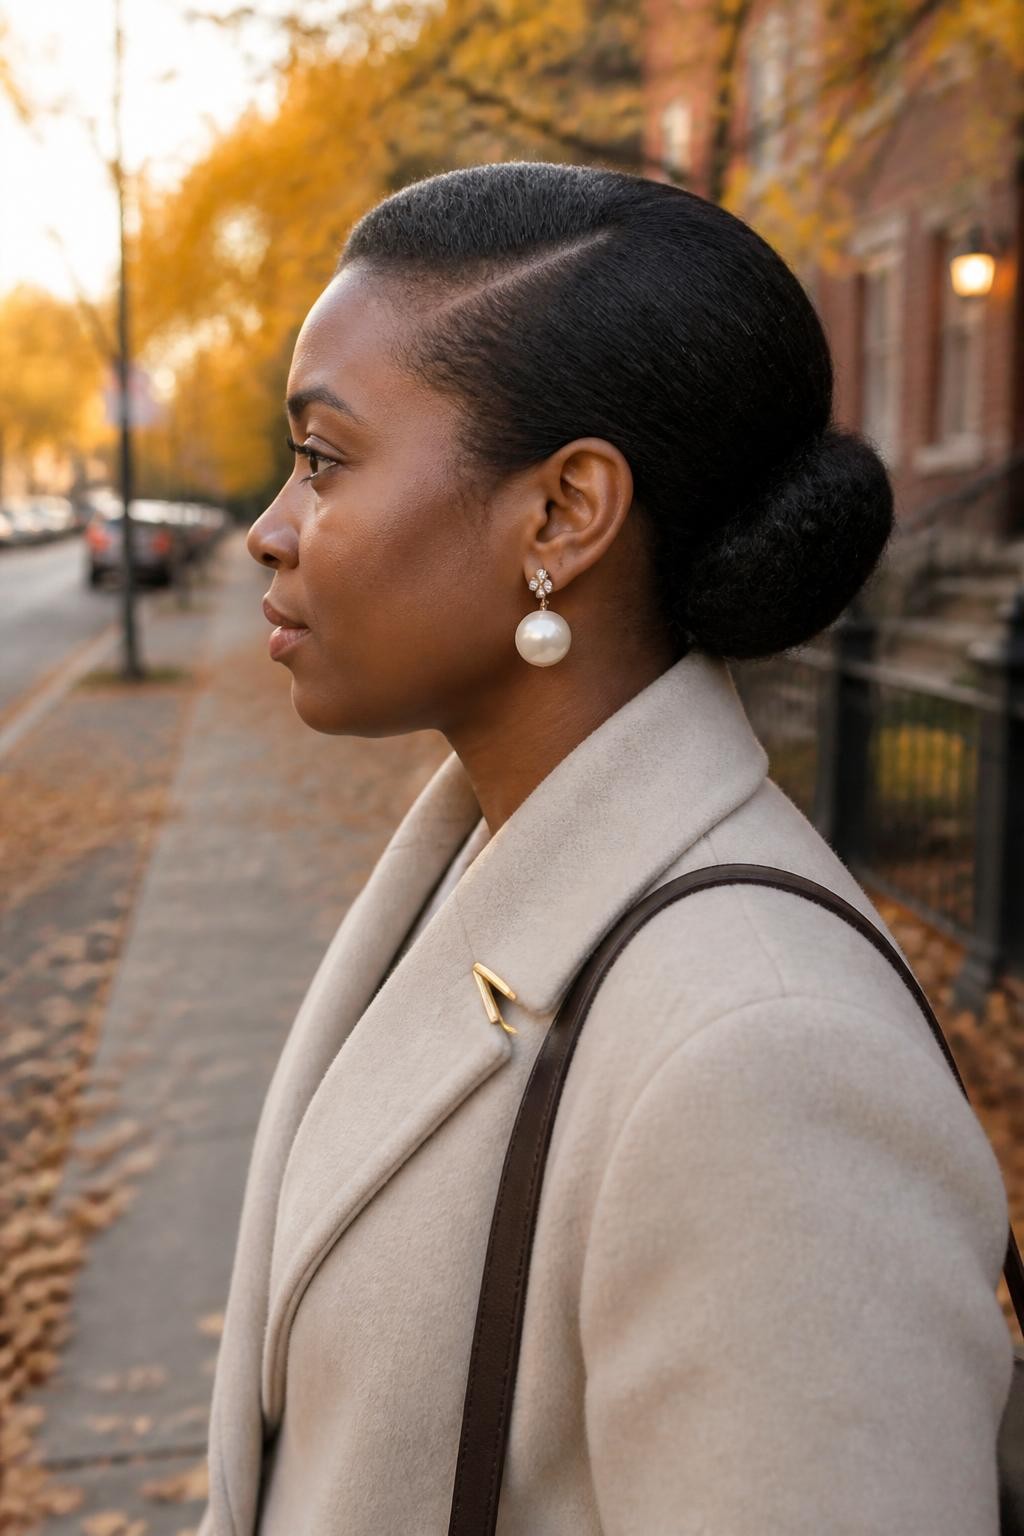
A tucked low roll gives stretched natural hair a smooth, graceful shape without needing a curling iron or complicated pinning. It suits workdays, family gatherings, church, and other fall occasions when you want something neat but not too formal. The tucked ends remain protected from dry air and rubbing against scarves.
What you need
- Leave-in conditioner for moisture
- Soft-bristle brush for smoothing the surface
- Thin elastic headband to guide the roll
- Bobby pins for holding the tucked hair
- Light finishing spray for flyaways
How to style it
- Apply leave-in conditioner to stretched hair and create a middle or soft side part.
- Place a thin elastic headband over the hair, sitting low around the back of the head.
- Roll small sections upward and tuck them over and under the elastic until all ends are hidden.
- Add bobby pins where needed and smooth the front without making it too flat.
Quick tip: Avoid pulling the roll too tightly so it keeps a soft, full shape around the back.
10. Mini Twists with Amber Beads
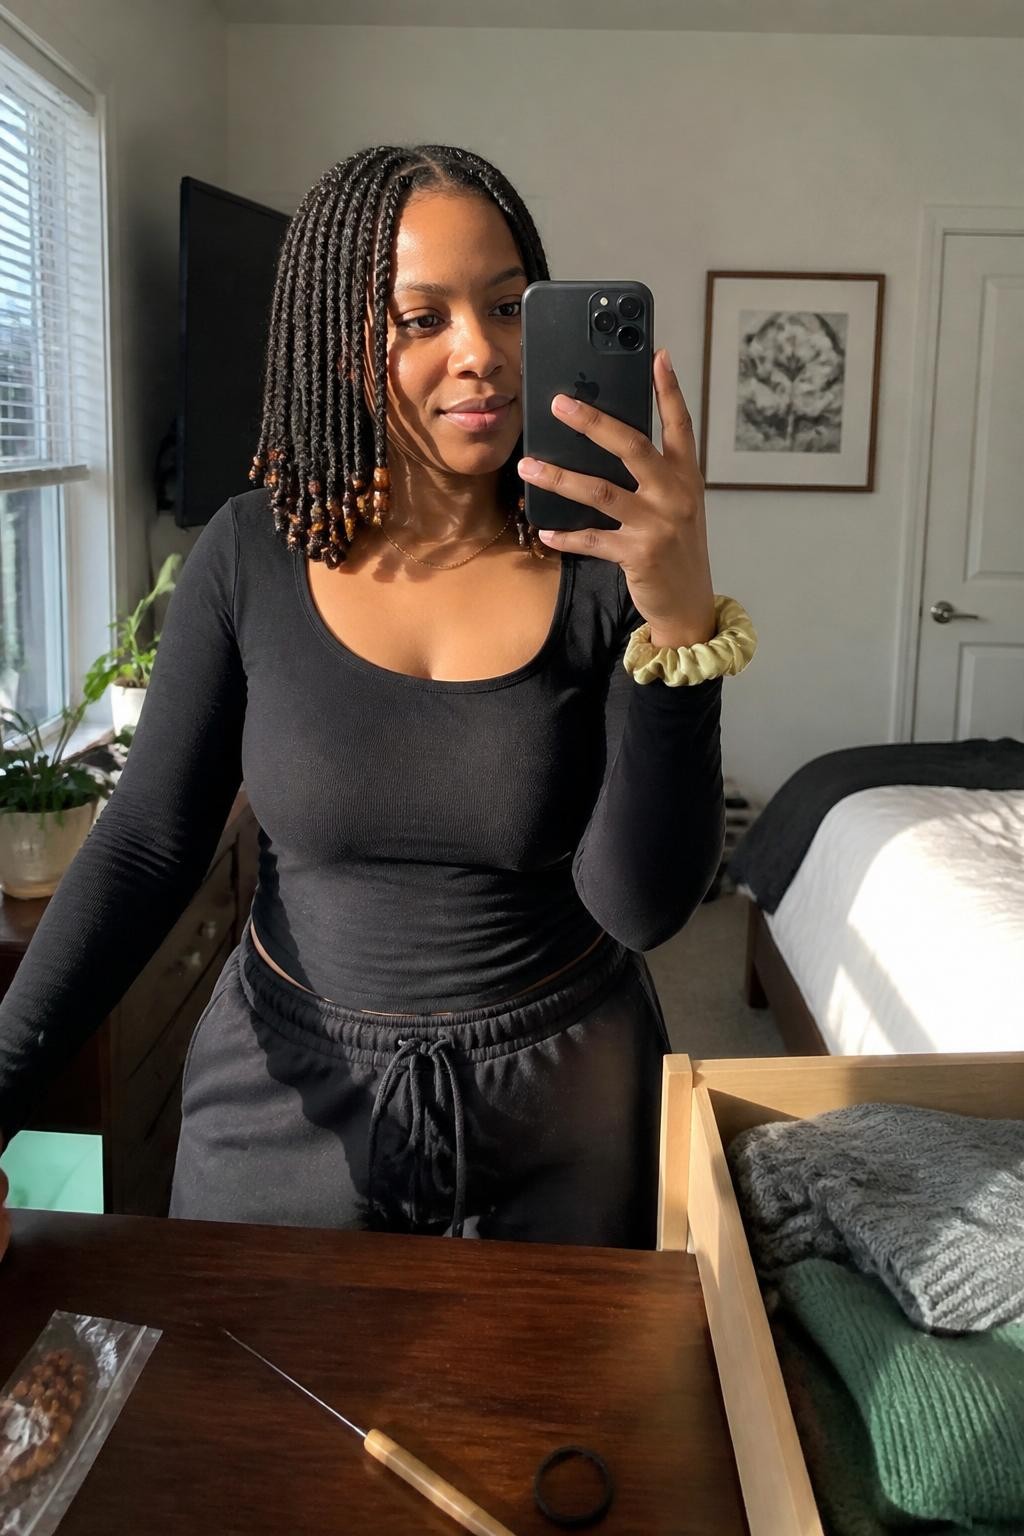
Mini twists with amber beads give natural hair a delicate protective finish with a warm fall detail at the ends. They are a strong choice for women who want a style that can be worn down, pinned up, or gathered into a ponytail. Once installed, they need very little work each morning.
What you need
- Leave-in conditioner for lasting moisture
- Twist cream for definition
- Fine-tooth parting comb for small sections
- Amber or brown hair beads for the ends
- Beading tool or folded wire for easy placement
How to style it
- Detangle moisturized hair and divide it into small, even sections.
- Apply twist cream to one section at a time and create firm two-strand twists.
- Slide one or two amber beads onto selected ends and secure them by folding the hair upward.
- Allow the twists to dry, then separate the roots gently so the style does not look too flat.
11. Auburn Curly Crochet Bob
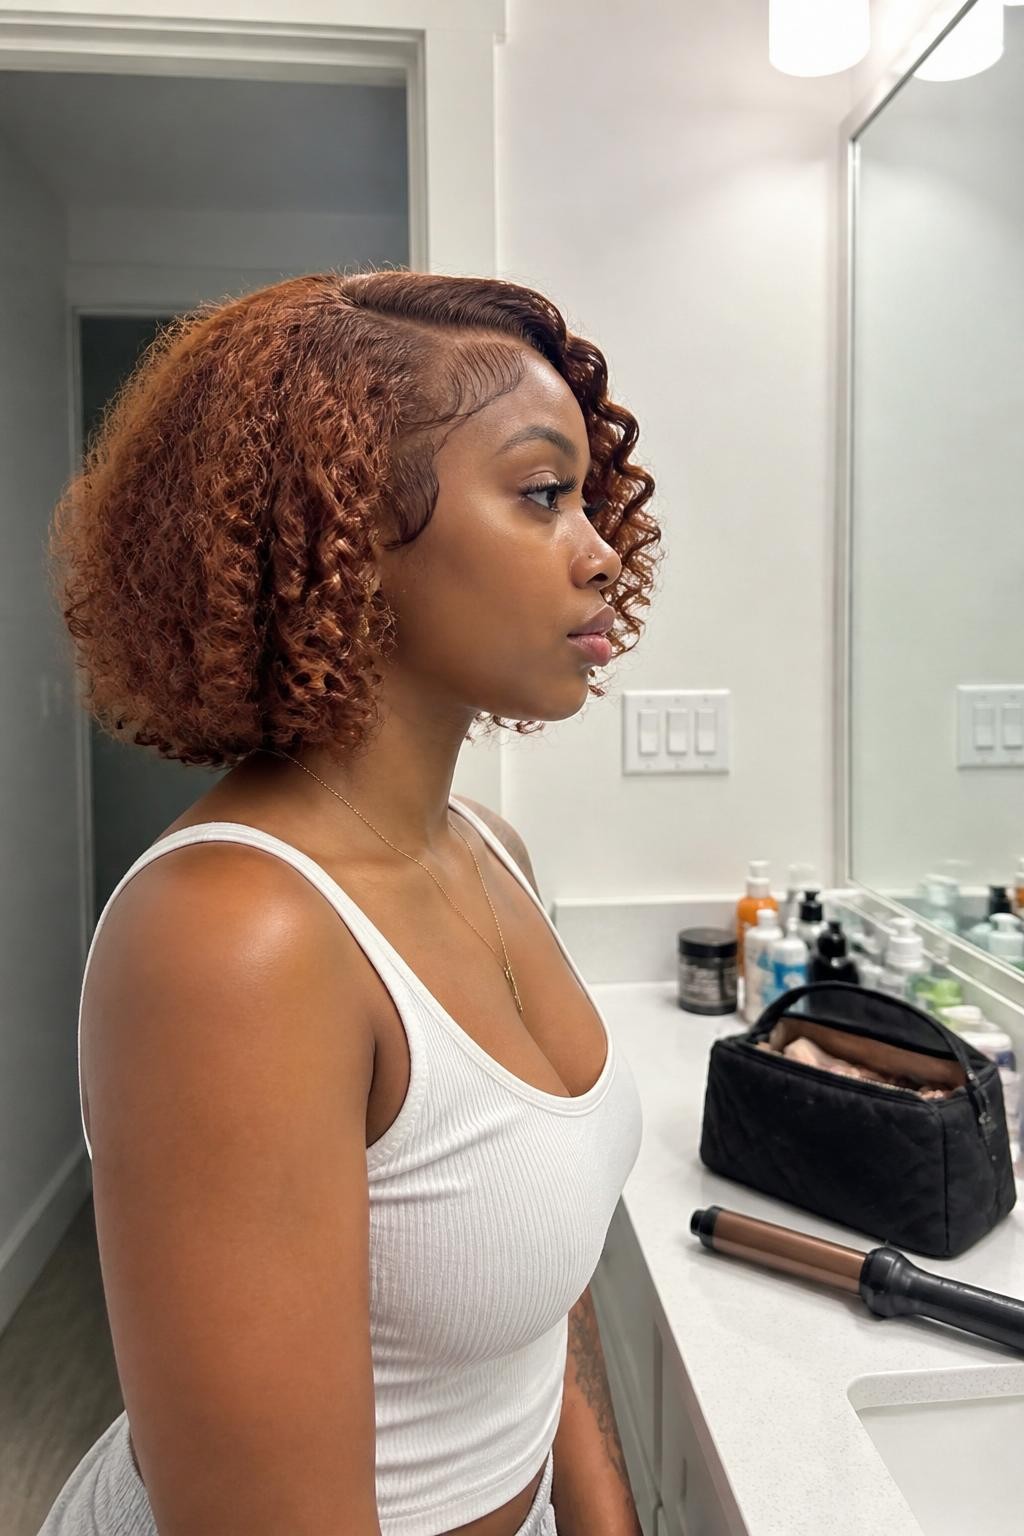
An auburn curly crochet bob brings warm color, soft curls, and manageable length together in one protective style. It works well for anyone who wants to try a seasonal hair color without dyeing their natural strands. The bob shape stays clear of coat collars while still providing plenty of fullness.
What you need
- Auburn curly crochet hair for the finished bob
- Crochet needle for attaching the extensions
- Braiding hair for strengthening the cornrow base
- Styling mousse for separating and shaping the curls
- Small scissors for trimming the outline
How to style it
- Braid clean, moisturized hair into flat cornrows that follow the shape of the head.
- Use a crochet needle to attach the curly hair throughout the braided base.
- Separate the curls carefully and trim them into a rounded bob that frames the face.
- Apply a little mousse, shape the side part, and remove any curls that feel too bulky.
Quick tip: Add less crochet hair near the hairline so the bob falls naturally instead of becoming too full around the face.
12. Double Cornrow Low Buns
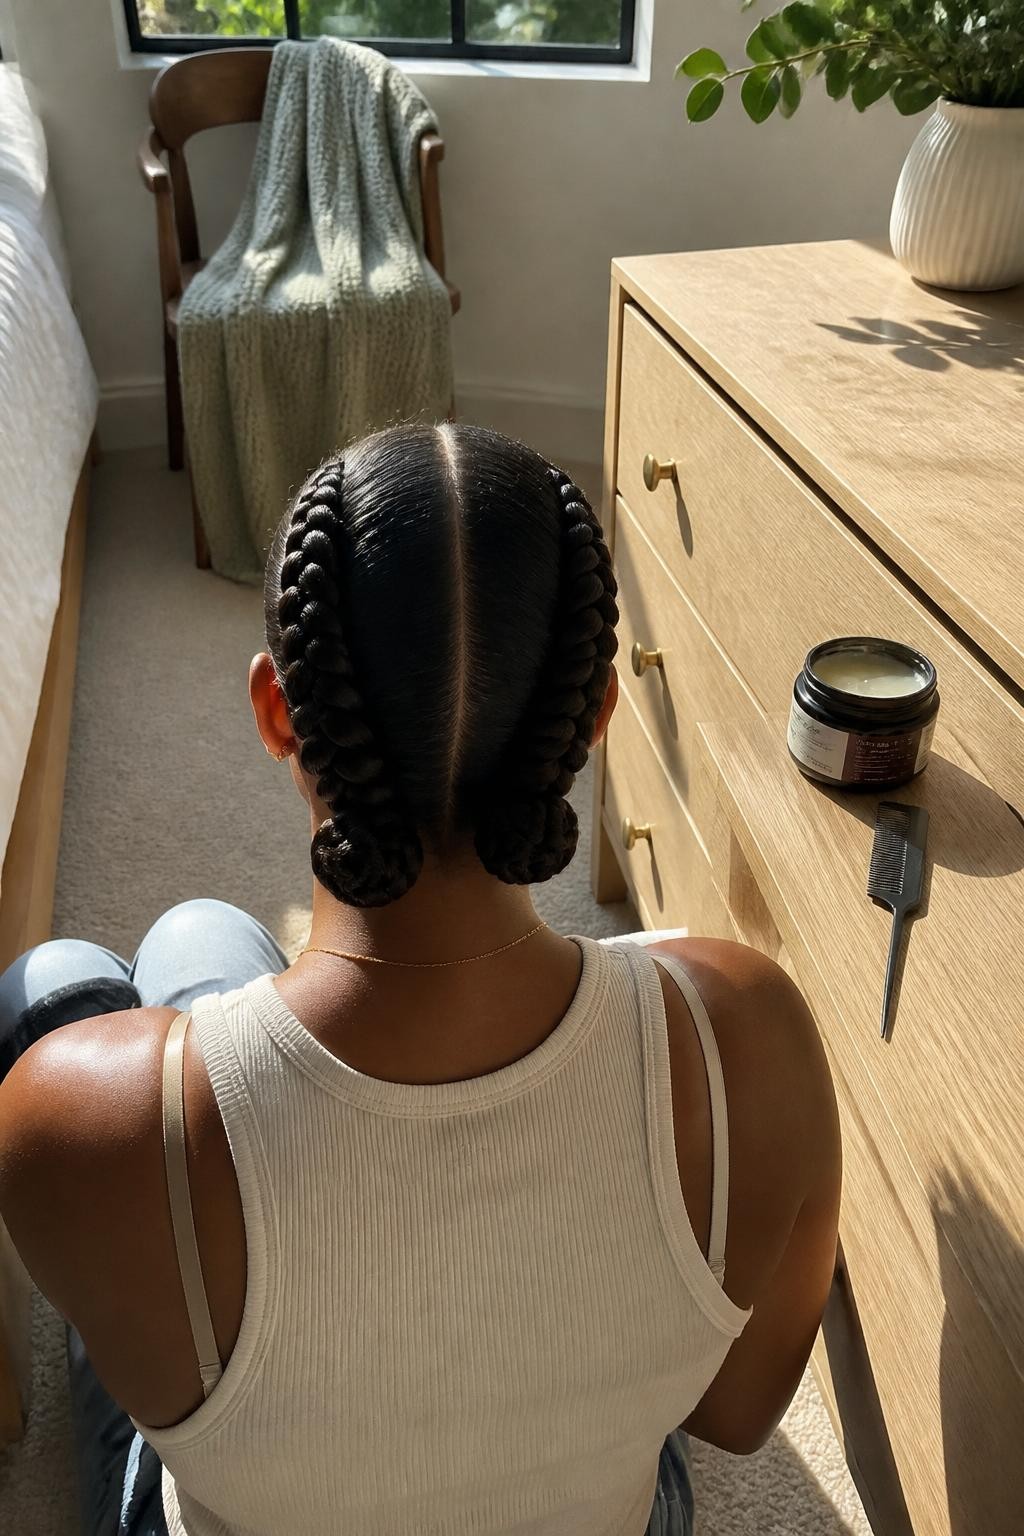
Double cornrow low buns create a clean, balanced style that remains secure through work, errands, and windy weather. The center part and braided detail add interest, while the low buns fit comfortably beneath hoods and scarves. It is especially helpful for stretched natural hair that needs to stay protected for several days.
What you need
- Moisturizing styling cream for softness
- Rat-tail comb for the center part
- Braiding gel for neat cornrows
- Two snag-free hair ties for the buns
- Bobby pins for securing the ends
How to style it
- Divide moisturized, stretched hair down the center from the forehead to the nape.
- Cornrow each half backward, keeping the braids close to the scalp without pulling tightly.
- Secure each braid at the nape and wrap the loose length into a small low bun.
- Pin the ends underneath and smooth the hairline with a small amount of gel.
13. Silk-Press Lob with Bent Ends
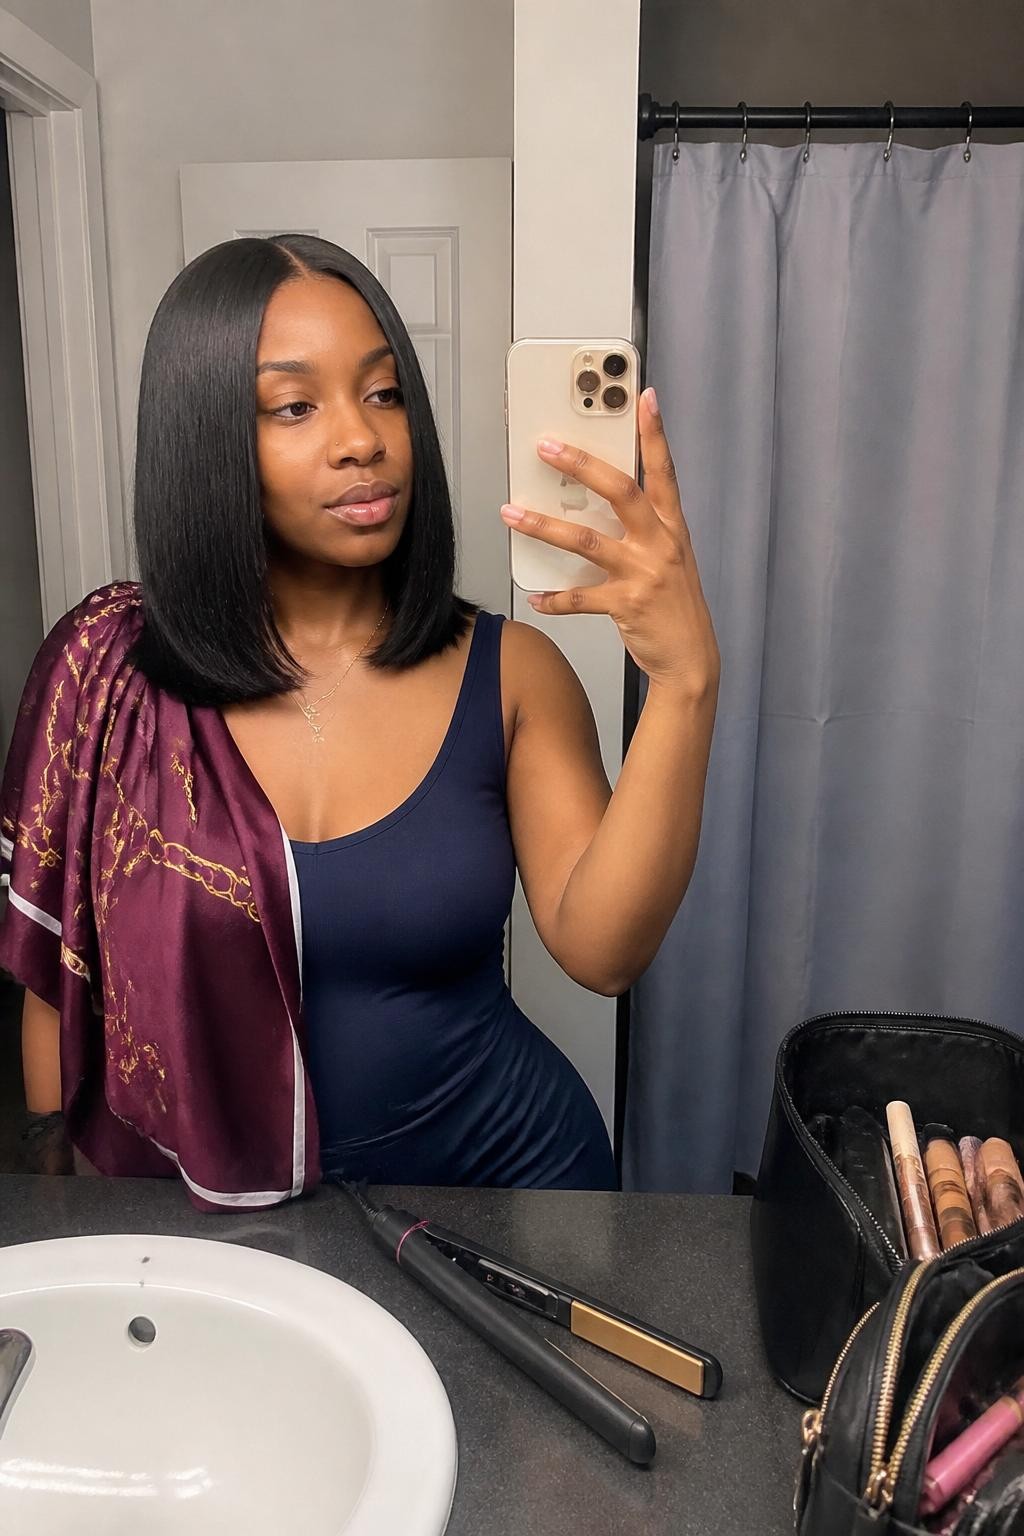
A silk-press lob with softly bent ends looks smooth, light, and polished without losing all its movement. It is best for dry fall days when humidity is low and you want a temporary straight style for work, photos, or a special outing. The shoulder-skimming length also looks lovely with turtlenecks and structured jackets.
What you need
- Heat protectant to reduce heat damage
- Blow-dryer with a comb attachment for stretching
- Ceramic flat iron for smoothing small sections
- Large rollers for creating bent ends
- Lightweight anti-humidity serum for shine
How to style it
- Wash, deep-condition, and apply heat protectant throughout clean hair.
- Blow-dry the hair in small sections until it is fully stretched and dry.
- Pass the flat iron through thin sections once, curving it slightly inward near the ends.
- Wrap the ends around large rollers for a few minutes, then finish with a small amount of serum.
Quick tip: Check the weather before choosing a silk press, since rain and heavy moisture can cause the roots to swell quickly.
14. Halo Braid with Loose Temple Curls
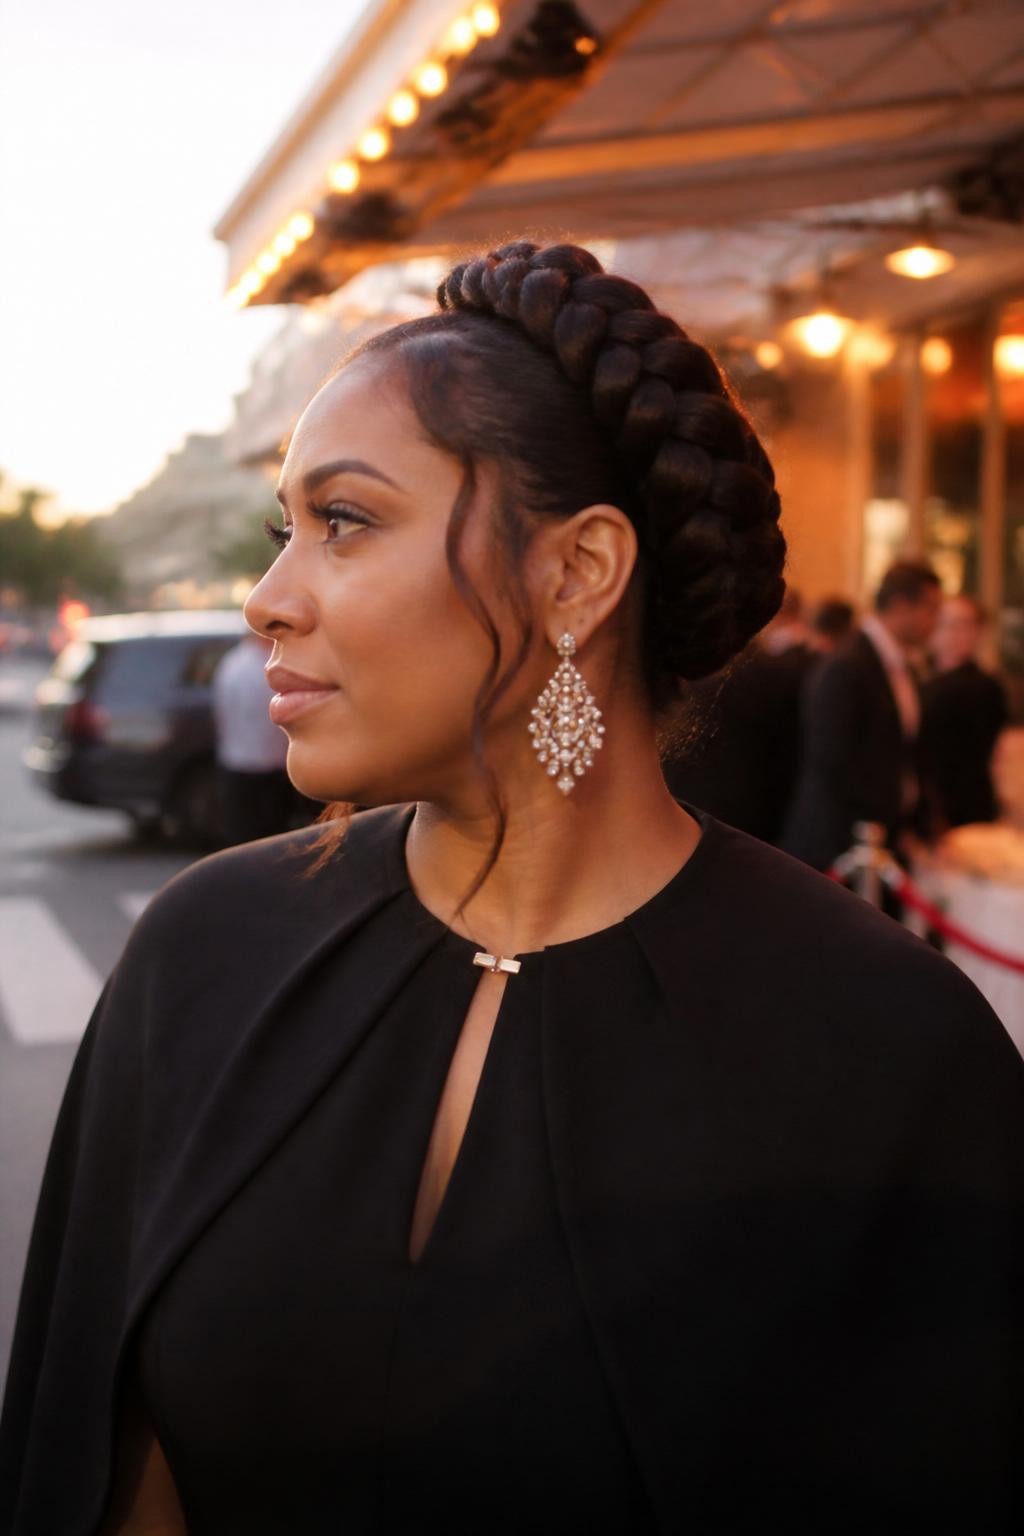
A halo braid with loose temple curls feels graceful while still showing a little natural texture around the face. It is a beautiful choice for fall weddings, dinner parties, family photos, or any event that calls for a polished protective style. The raised braid also keeps the hair away from coats and high necklines.
What you need
- Moisturizing cream for preparing the hair
- Braiding hair for a fuller halo
- Edge gel for gentle control around the front
- Bobby pins for securing the braid
- Small curling rod for shaping the temple curls
How to style it
- Moisturize and stretch the hair, leaving one small section loose at each temple.
- Create one long braid with your natural hair and extension hair, then wrap it around the head.
- Pin the braid securely into a halo shape and hide the end beneath the starting point.
- Coil the loose temple sections around a small rod, release them, and smooth the hairline lightly.
15. Claw-Clip French Roll
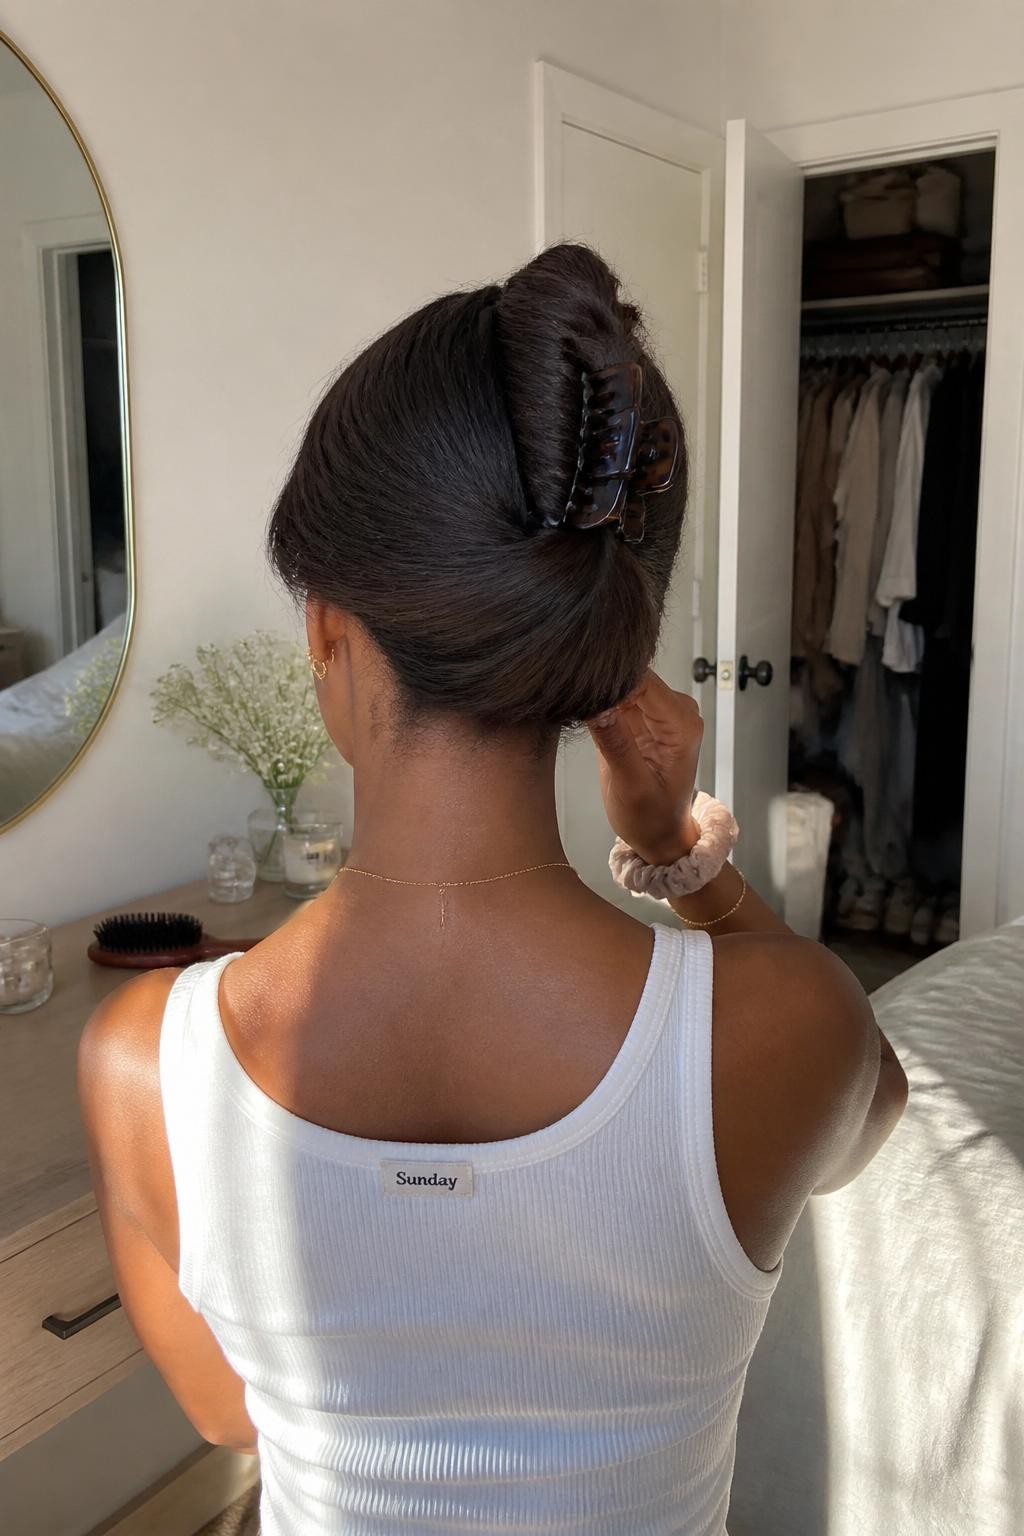
A claw-clip French roll turns stretched natural hair into a soft, upright twist with very little effort. It works well for busy mornings, video calls, casual office days, or second-day hair that needs a quick change. A large tortoiseshell clip brings in a classic fall detail while holding thicker hair securely.
What you need
- Lightweight leave-in spray for refreshing the hair
- Wide-tooth comb for removing tangles
- Large tortoiseshell claw clip for strong hold
- Edge brush for tidying the front
- Light hair oil for the ends
How to style it
- Refresh stretched hair with leave-in spray and smooth a little oil over the ends.
- Gather the hair at the nape as though you are making a low ponytail.
- Twist the length upward against the back of the head and fold the ends inward.
- Fasten the roll with the claw clip, then loosen the crown slightly for a softer shape.
Quick tip: Choose an extra-large clip with long teeth when working with thick or dense natural hair.
16. Burgundy Boho Box Braids
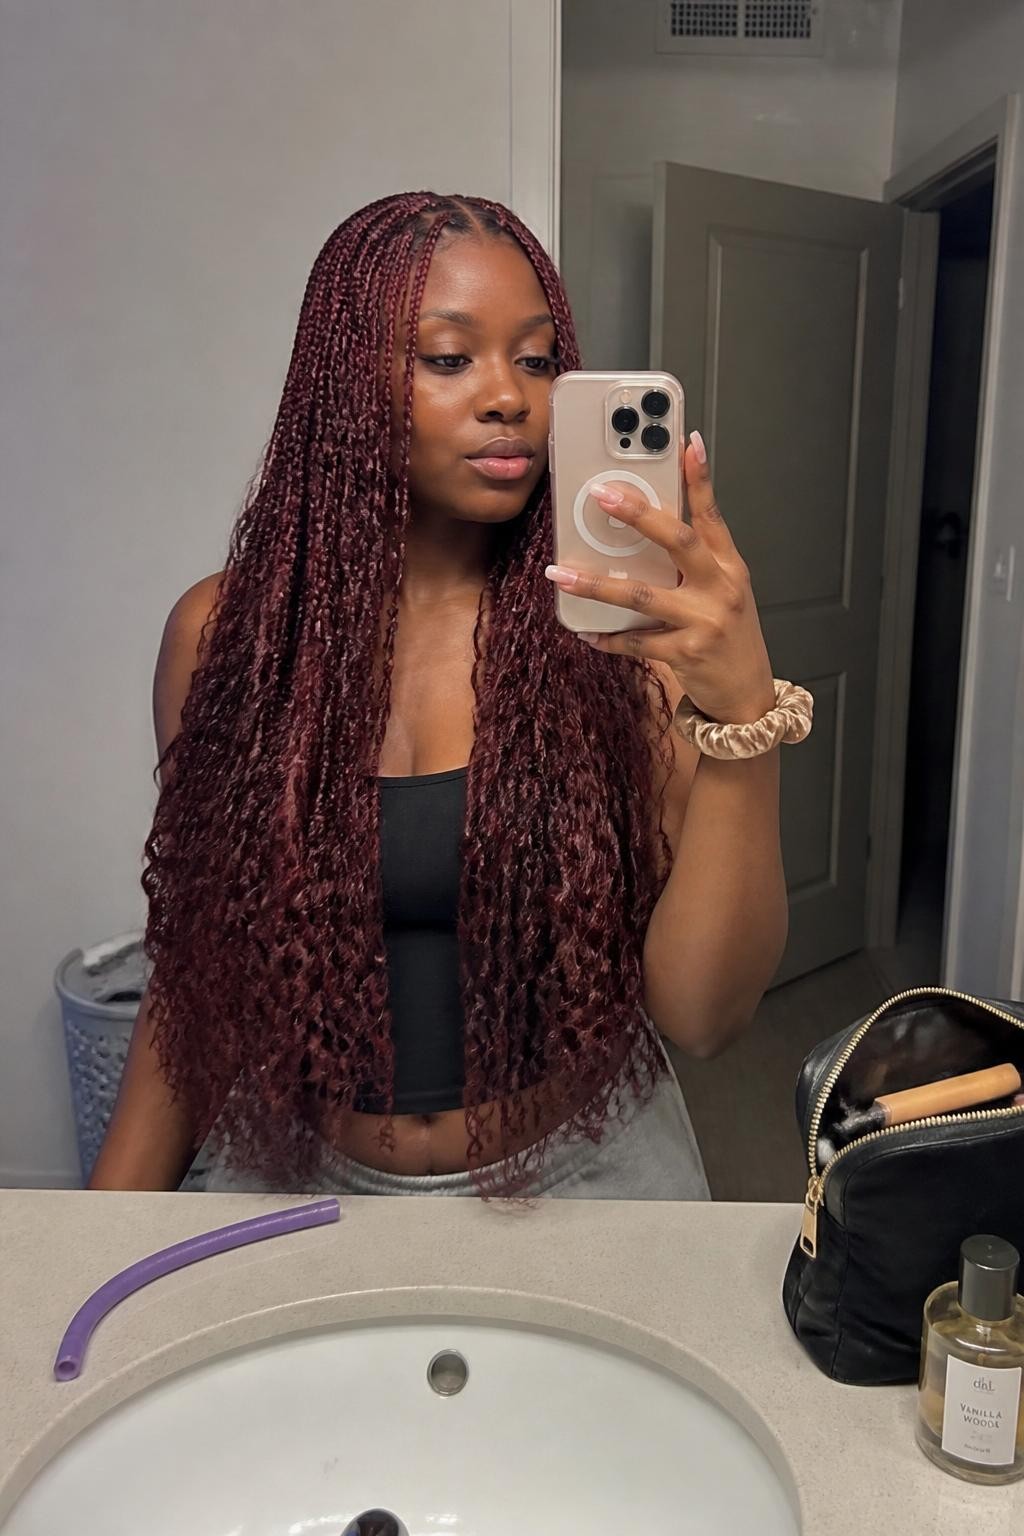
Burgundy boho box braids combine rich seasonal color with loose curls placed throughout the braids. They are perfect for women who want a protective style that feels softer and more romantic than traditional box braids. The darker red shade looks especially striking beside camel, charcoal, cream, and denim.
What you need
- Burgundy pre-stretched braiding hair for the main braids
- Burgundy water-wave hair for the loose curls
- Braiding gel for clean sections
- Hair mousse for setting the finished style
- Flexi rods for shaping the curly ends
How to style it
- Divide clean, stretched hair into medium sections and apply braiding gel to each base.
- Feed in burgundy braiding hair and create each box braid with even tension.
- Add small pieces of water-wave hair at different points, leaving sections loose for the boho finish.
- Wrap the ends around flexi rods, dip only the braided portions safely, and apply mousse after cooling.
Quick tip: Apply mousse to the loose curls every few days and separate them gently with your fingers instead of a brush.
17. Finger-Coiled Tapered Cut
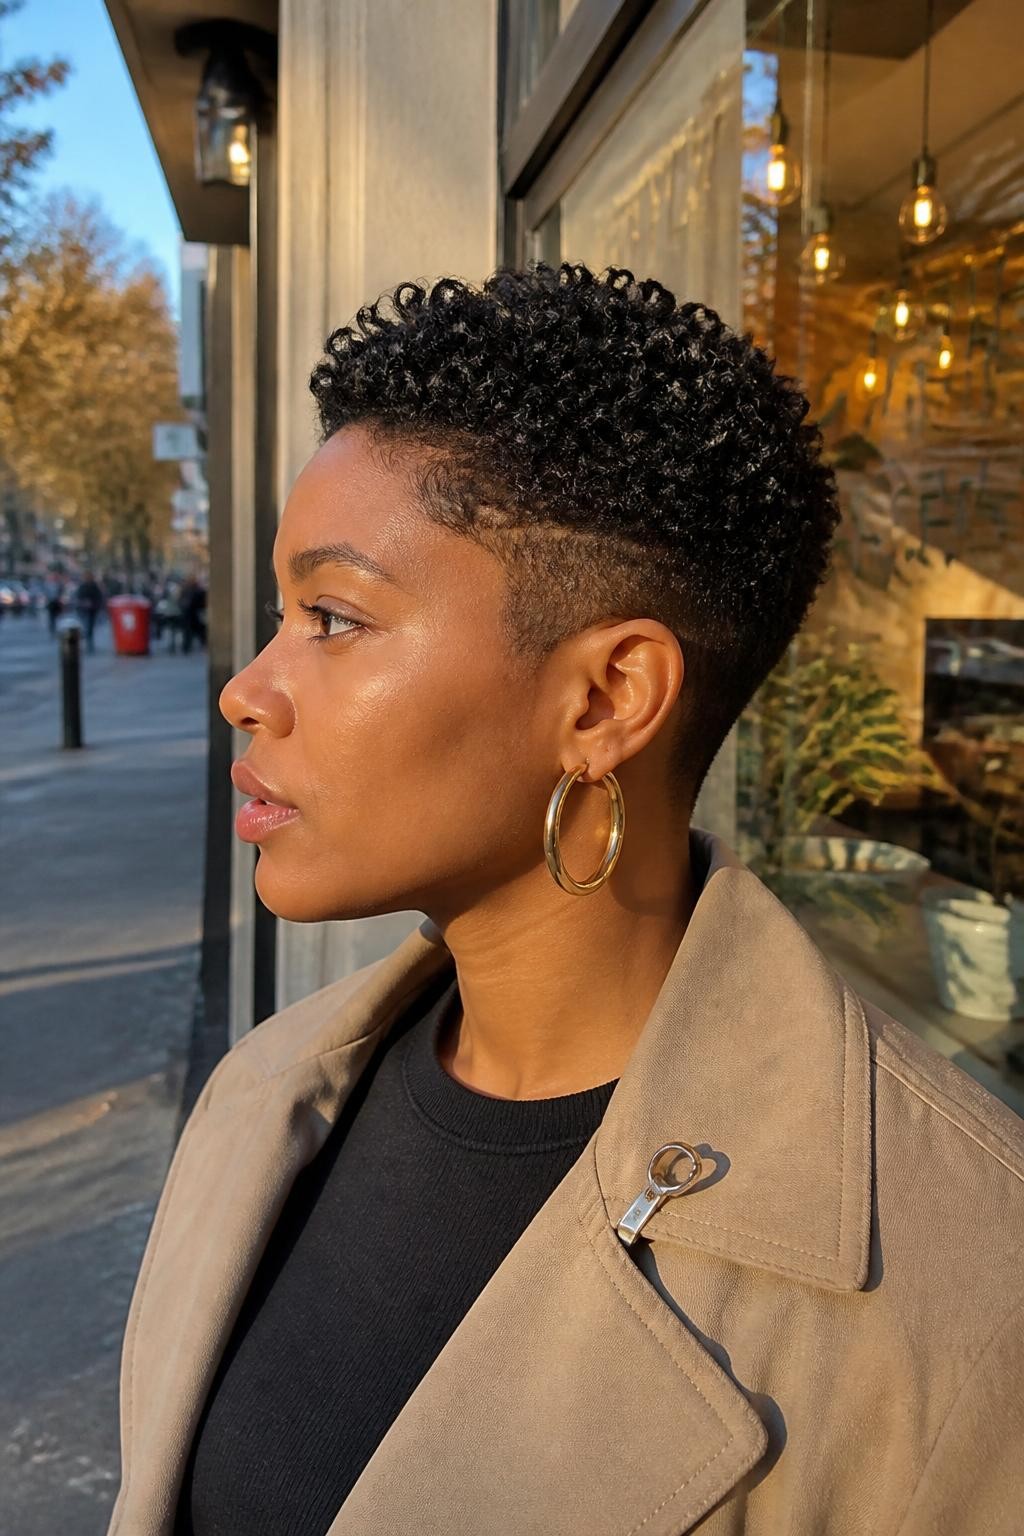
A finger-coiled tapered cut gives short natural hair clear curl definition with softly shaped sides and more height at the top. It works well for women who want an easy wash-day style that can last several days with basic nighttime care. The defined coils also hold up nicely beneath loose beanies when the weather turns cooler.
What you need
- Leave-in conditioner for a moisturized base
- Curling gel for firm but flexible definition
- Fine-tooth comb for creating small sections
- Spray bottle for keeping the hair damp
- Hair pick for adding height at the crown
How to style it
- Apply leave-in conditioner to clean, damp hair and divide the longer top area into small sections.
- Smooth curling gel through one section and wrap it around your finger from root to end.
- Repeat across the top and define the shorter sides with smaller coils or a curl sponge.
- Allow the hair to dry completely, then lift only the roots at the crown with a pick.
18. Scarf-Wrapped Pineapple Updo
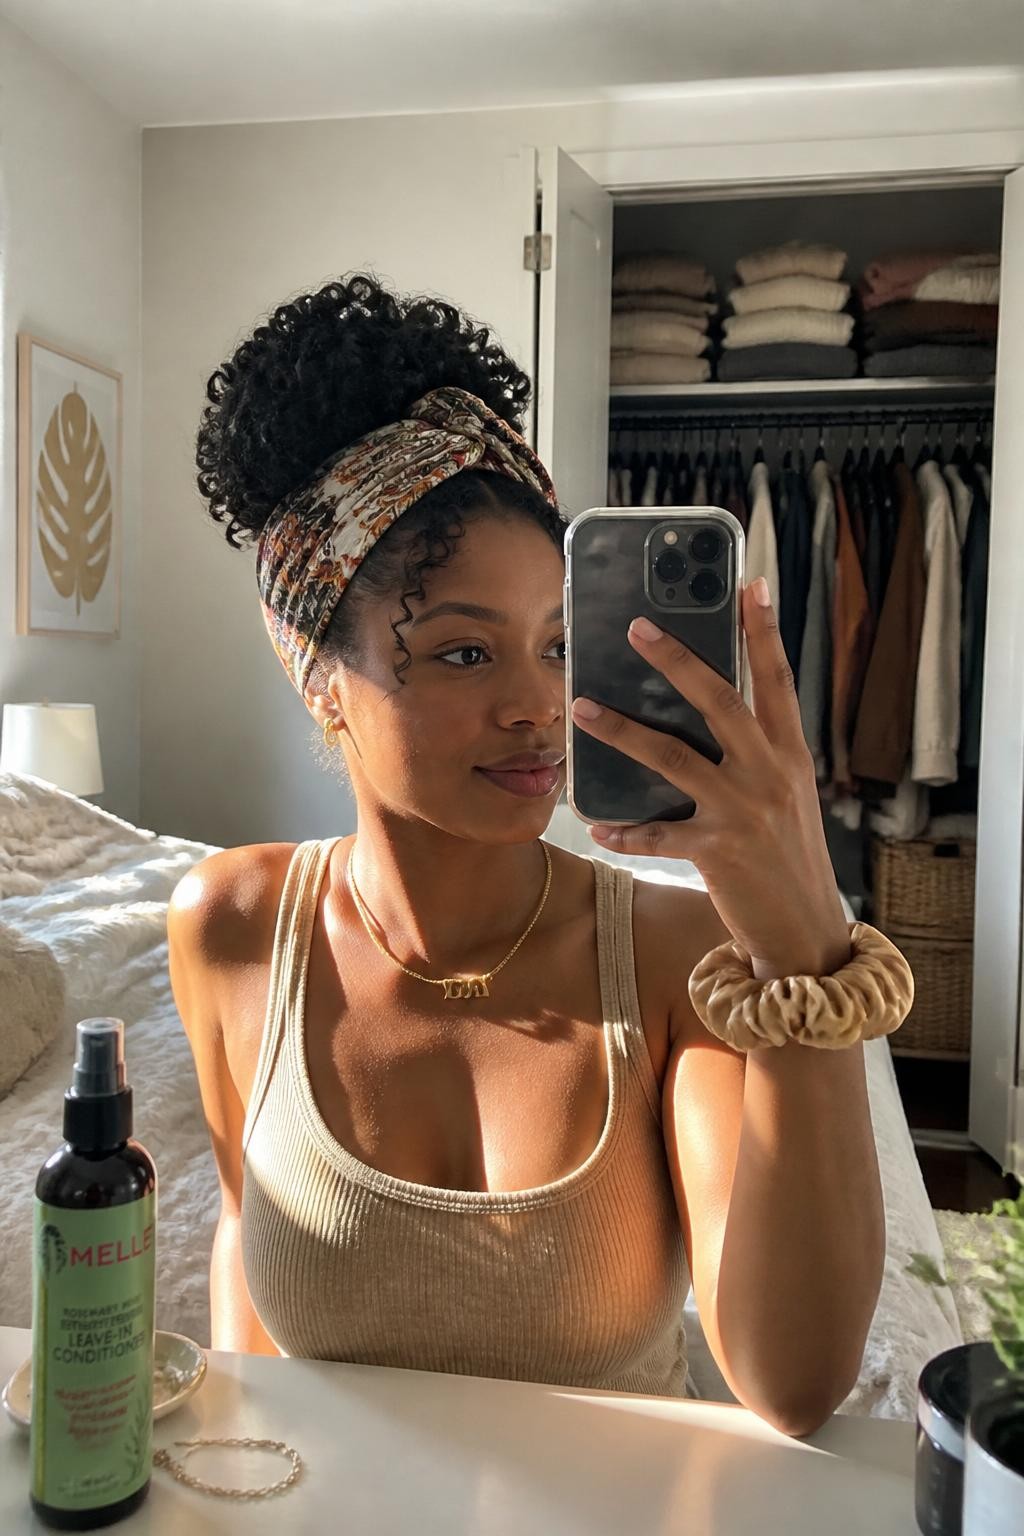
A scarf-wrapped pineapple updo gathers curls high on the head while a fall-print scarf adds color around the base. It is an easy choice for older twist-outs, wash-and-go styles, or mornings when you need to leave quickly. The scarf also protects the edges from dry air and creates a finished look without extra heat.
What you need
- Curl-refreshing spray for reviving the ends
- Large satin scrunchie for gathering the hair
- Long printed scarf in a fall color
- Edge brush for gentle smoothing
- Lightweight curl foam for controlling frizz
How to style it
- Mist the curls with refreshing spray and scrunch a little foam into any frizzy areas.
- Gather the hair loosely at the top of the head and secure it with a satin scrunchie.
- Fold the scarf into a long strip, wrap it around the base, and tie it at the front or side.
- Fluff the curls forward, adjust the scarf, and leave the hairline soft rather than heavily styled.
Quick tip: Tie the scarf over a satin scrunchie instead of directly against the hair to reduce tension around the edges.